

Need just a tiny image in a single, solid color — for a Safari background, as a design placeholder, a CSS tile, or a quick color swatch perhaps? You can turn to any of the powerful image editors, of course, or to an online tool, but you don’t have to: macOS comes with everything you need. Find out here how to create a small, single-color image with just Preview on a Mac ⤓.
On This Page
How to Create a Small, Single‑Color Image on a Mac Using Just Preview
Time needed: 5 minutes
To create a new image that consists of just one single, solid color using nothing but macOS Preview on a Mac:
- Create a new blank image in Preview.
Here’s how: Select File | Take Screenshot | From Selection… from the menu in Preview, then take a screenshot of vaguely the right size of any part of the screen.
Start from a template: You can also start from a template to make a new, empty canvas of just the size you need in Preview. - Optional: Adjust the size to your needs and tasting.
Crop: Use a rectangular selection and select Tools | Crop to crop the image down to the right size.
Expand: You can also expand the canvas in Preview as needed. - Optional: Clear the canvas.
Here’s how: Press Command A to select the entire image, then press Backspace to delete.
- Select Tools | Annotate | Rectangle from the menu.
- Resize the rectangle so it covers the entire image.
How big: You can make the rectangle expand beyond the canvas on all sides.
- Choose the color you want to use for the image as the fill color.
Here’s how: Click Fill color in the markup toolbar, then select the color or use Show Colors… to get the full color picker.
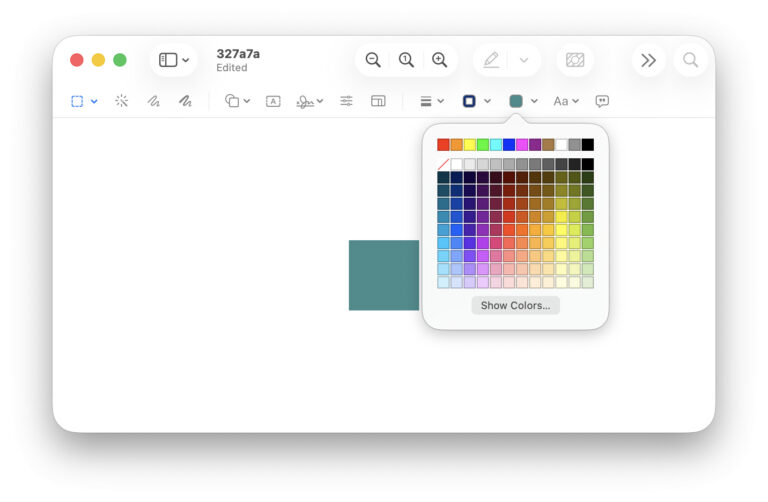
- Export the image as a PNG file.
Here’s how: Select File | Export… from the menu, navigate to the the folder where you want to save the image and select PNG under Format:.
Small, square and salmon?
Tips help fuel these email and tech how-tos.
How to Create a Small, Single‑Color Image on a Mac Using Just Preview: FAQ
What size should I use for single-color background tiles?
To save space, try a 1×1 PNG image first. If you have to use JPEG, experiment with a larger image size and high quality to avoid compression artifacts.
For a single-color Safari Start Page background, a PNG with 1×1 pixels works well, for example.
Can I make a fully transparent image in Preview?
Yes.
To create a fully translucent PNG image in Preview:
- Create a new blank image in Preview; see above.
Just new: Do not add any items using the annotation toolbar to the image. - Choose Edit | Select All in the menu.
Preview keyboard shortcut: You can also press Command A, of course. - Now select Edit | Delete from the menu.
Preview items: If items added in Preview remain, do click them individually to select, then press Backspace to remove them. - Resize the canvas to the desired size; see above.
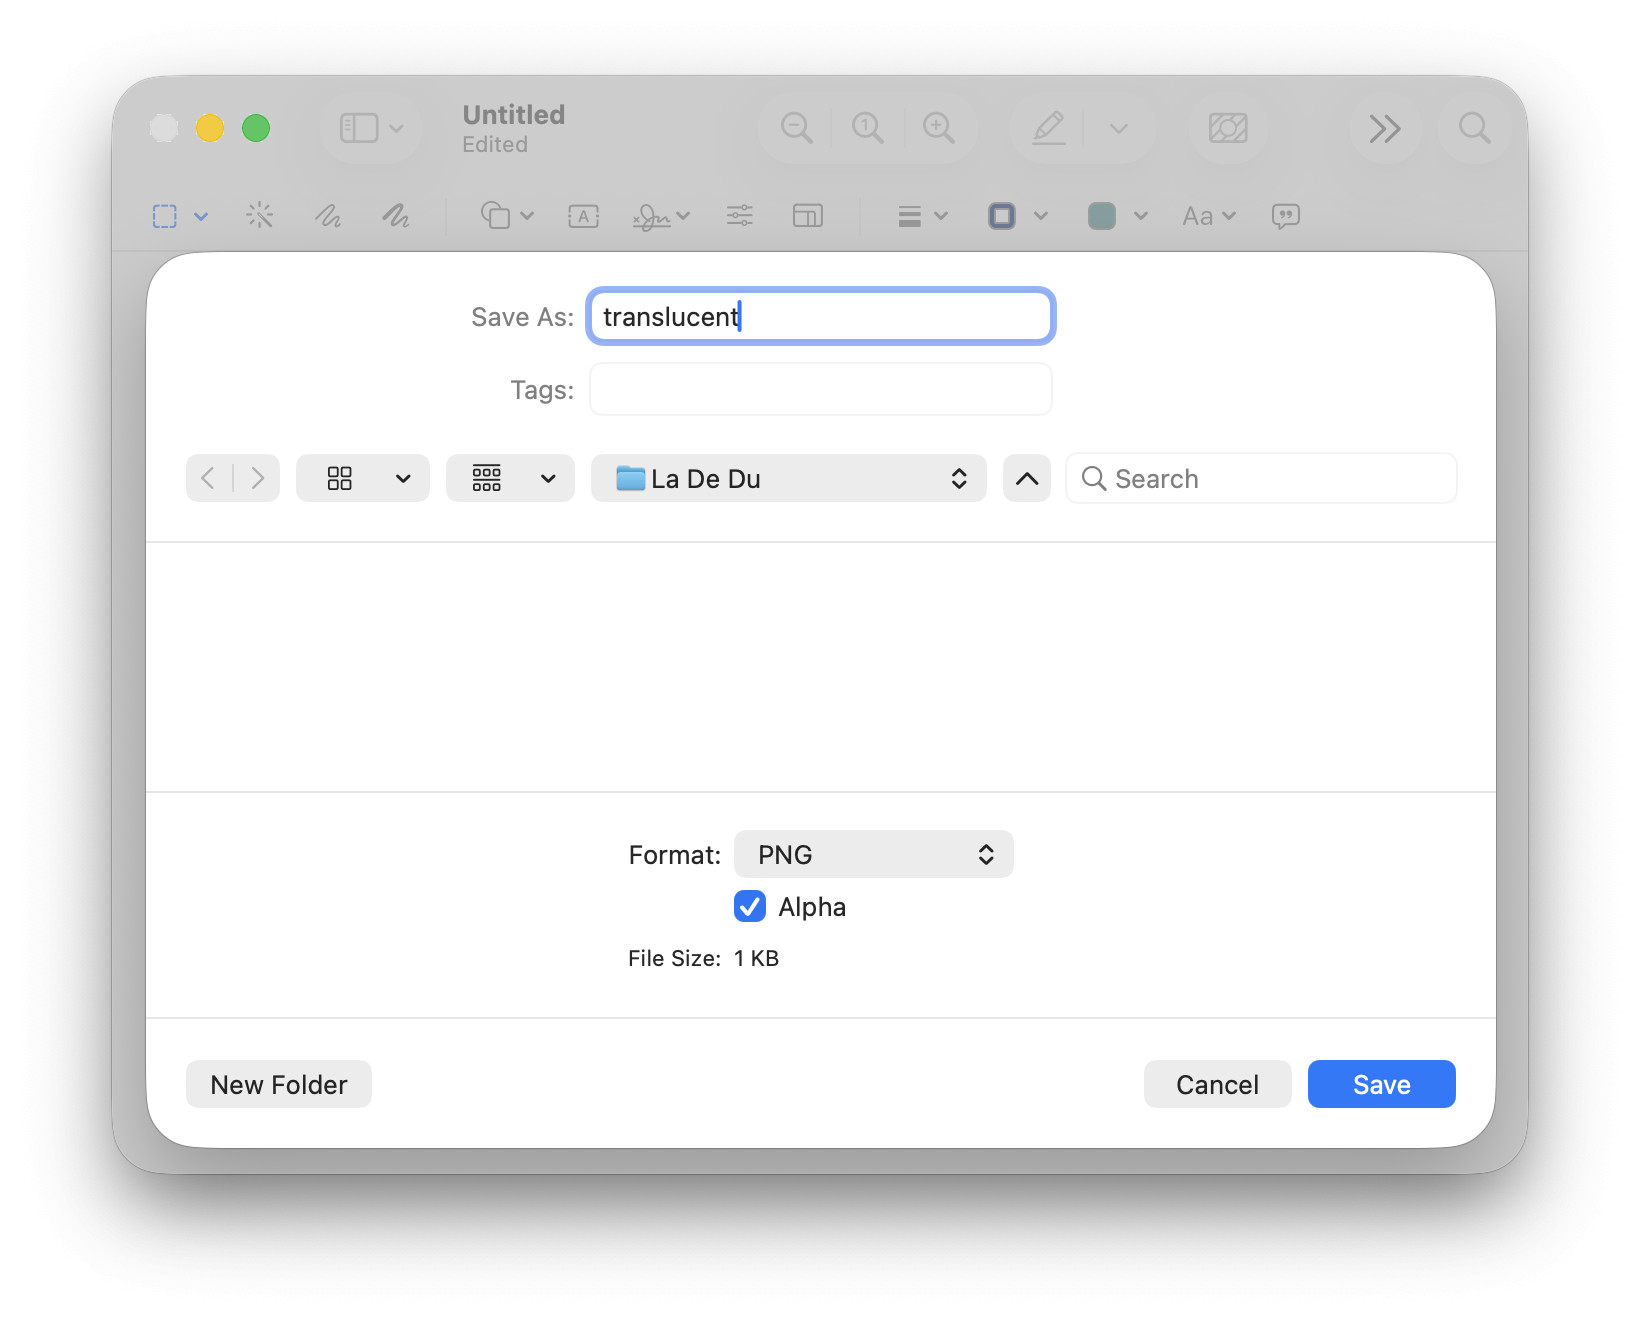
- Select File | Save from the menu
- Choose PNG for the Format:.
- Check Alpha.
Here’s why: PNG files save translucency as an alpha channel, so this combination lets you save a transparent file. - Navigate to the folder where you want to save the file.
- Enter the name you want to use for your transparent file under Save As:.
- Click Save.
(Tested with Preview 11 on macOS Tahoe 26; first published May 2026)