
Downloaded a ZIP file, and now it just sits there in your Downloads folder? Should you double-click it, drag it or use special software on it? Can you extract individual documents from it without unzipping everything? Find out here how to unzip files on a Mac using Finder or Terminal.
First, Cows of the Sky
In swamps and flooded forests along the Amazon and Orinoco rivers, a curious bird clambers through branches munching leaves.
Unique among birds, the hoatzin sports an enlarged crop where bacteria ferment tough cellulose much like in a cow’s rumen. This yields nutrients from nigh-indigestible leaves but also reeking gases that earn it the name “stinkbird.”
Speaking of extracting the good from the nigh incomprehensible, your Mac can unzip files and disgorge their contents cleanly — odor-free.
How to Unzip Files on a Mac
Unzip Archives Using macOS Finder
Time needed: 1 minute
To unzip all contents from a ZIP file on a Mac using Finder:
- Go to the folder that contains the ZIP file you want to unzip in Finder.
Here’s how: Finder lets you navigate to many common folders using shortcuts.
Is it safe? If you downloaded the file from the internet, you can also check it for malware and potential security issues online. - Double-click the ZIP file to extract all files from it to a new folder named like the ZIP file itself.
Directory structure: If the ZIP file contains a directory structure for the files, these folders will be used instead of the default folder name, of course.
Single file: If the ZIP archive contains only one file (without a directory structure), it will be extracted to the current folder.
No extraction: If Finder does not extract files from the ZIP file by default, you can click on the ZIP file with the right mouse button and select Open With | Archive Utility from the context menu instead.
The other way ’round: How to Zip Files on a Mac (without “__MACOSX”)
Unzip Files on the Mac Terminal
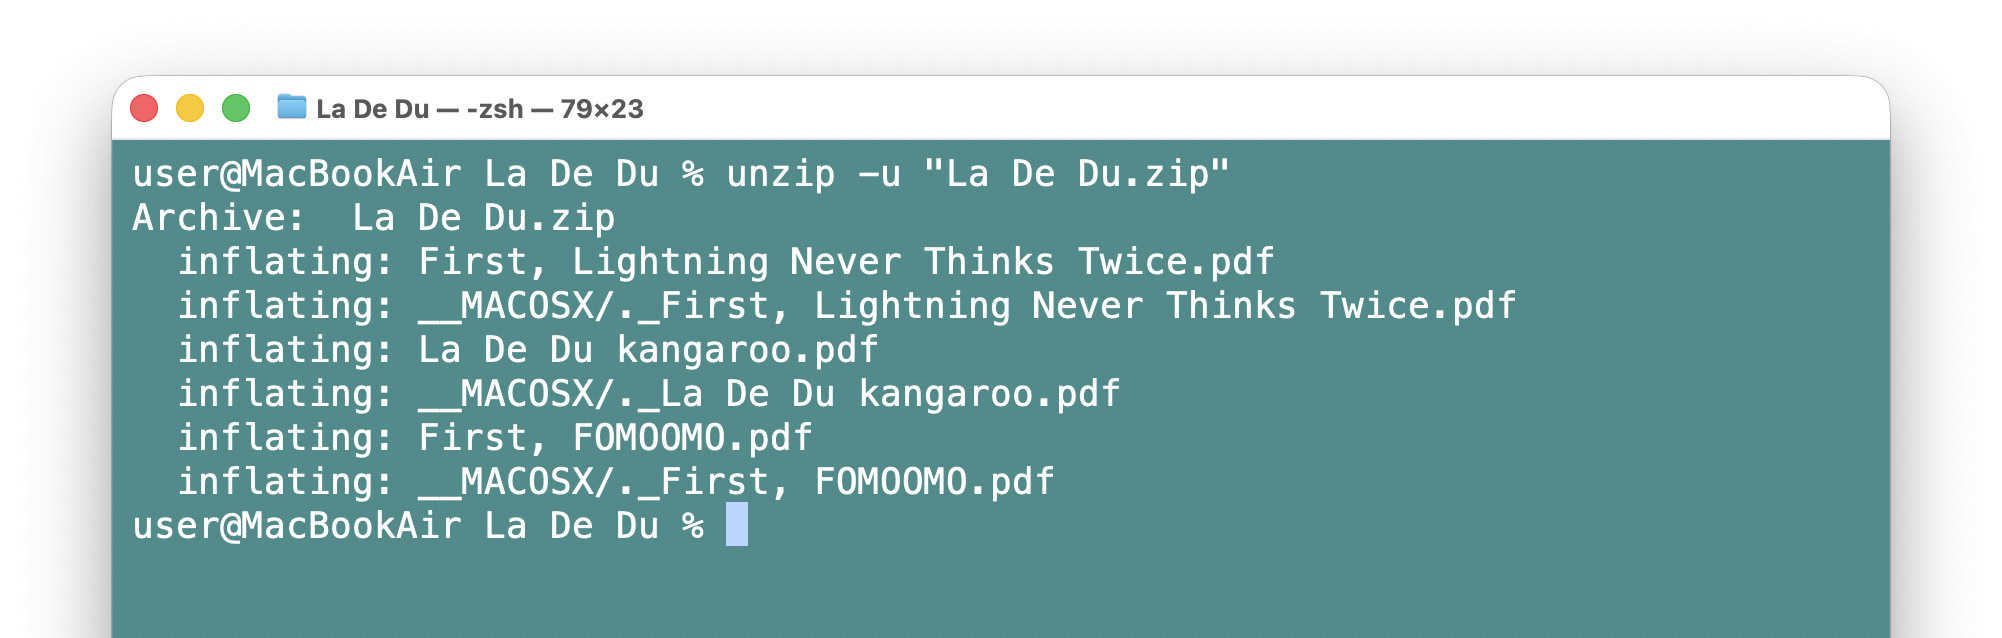
To extract files from a ZIP archive on a Mac Terminal prompt using unzip:
- Open Terminal.
From Finder: You can open Terminal right in the desired folder from Finder. - Type
unzip -u <archive.zip>.
Here’s why: The-uswitch instructs unzip to only create and update files but leave files that are already present and newer untouched.
<Archive.zip>: Replace <archive.zip> with the name of the ZIP file to be unzipped; you can omit the “.zip” extension.
Individual files: You can preview the files in a ZIP archive and extract individual files; see below.
__MACOSX: The unzip utility can skip the __MACOSX folder and the hidden files in it; also see below. - Press Enter.
Works across platforms:
How to Unzip Files on Linux (Gnome, KDE, Terminal)
How to Unzip Files on a Mac: FAQ
Can I unzip only select files using Mac Finder?
No.
Finder will always unzip all files from a ZIP archive. You can use either unzip in Terminal or a third-party utility such as Unzip One to list and extract archive contents selectively.
How can I unzip individual files from a ZIP archive using Terminal?
To list files in a ZIP archive on the command line in macOS Terminal:
- Run the command
unzip -l <archive.zip>.
Here’s why: The-lswitch makes the unzip utility list the contents of the ZIP file; replace <archive.zip> with the name of the ZIP file, of course.
To extract only select files in Terminal using unzip:
- Run
unzip <archive.zip> <file_1> <file_2> etc..
Etc.: You can specify any number of files to extract from the archive; separate files names using space (and enclose files names that contain whitespace with quotation marks).
Can I prevent unzip from inflating the __MACOSX files?
Yes.
To exclude all __MACOSX/ files from being extracted in Terminal:
- Run unzip <archive.zip> -x "__MACOSX/*".
Here’s why: The-xswitch excludes files from being extracted.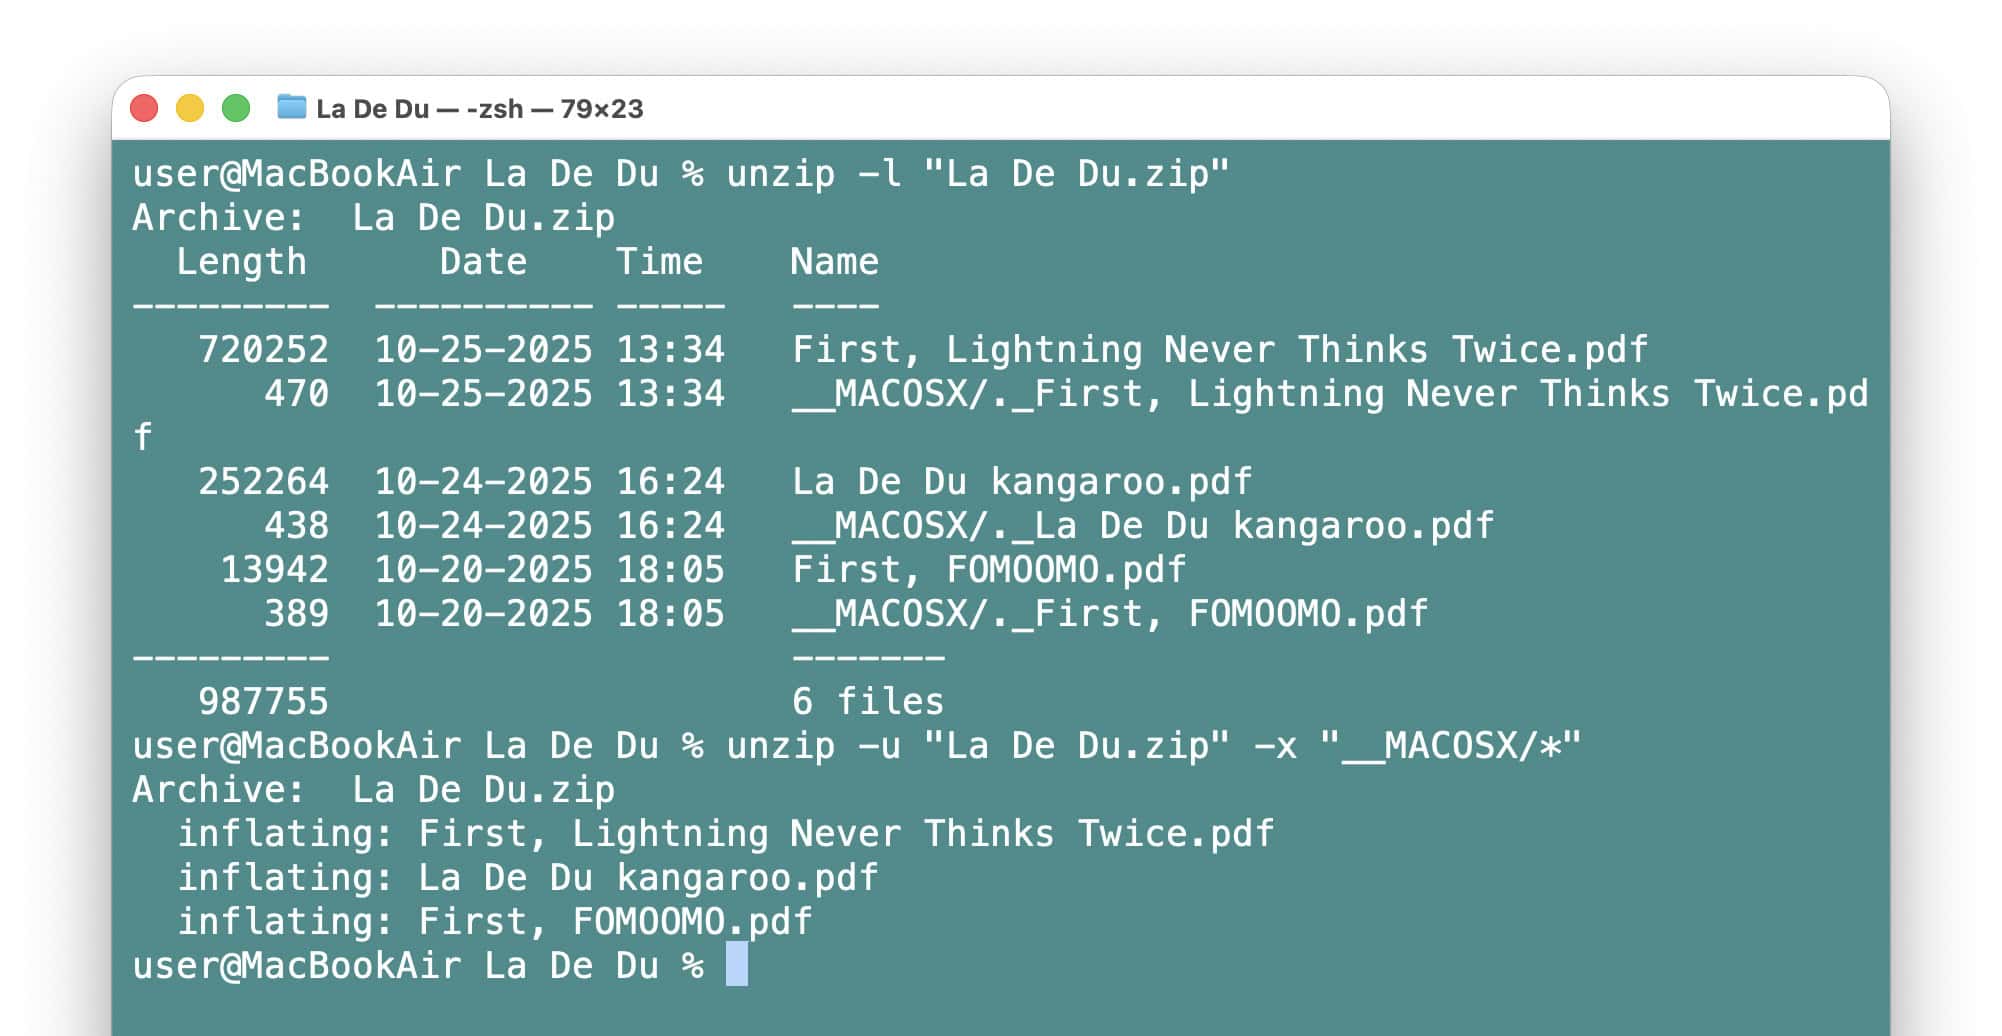
Can I unzip to a particular folder using Finder?
No.
Finder’s Archive Utility will always extract everything to the current folder. Move the resulting files and folders to the desired destination after extracting.
You can also resort to unzip on the Terminal to extract flexibly.
How do I extract to a particular folder using macOS Terminal?
To specify the destination for unzipping in macOS Terminal:
- Use the
-d <directory>switch in theunzipcommand.
Example:unzip ladedu -d ~/Documents/ladeduwill extract all files from the file ladedu.zip in the current directory to the Documents/ladedu folder in the current user’s Home directory.
Alternative: You can also go to the desired destination folder and run the unzip command in that folder using the full path to the ZIP file; by default, unzip extracts to the current directory.
(Tested with macOS Tahoe 26.2; first published December 2025)