
What if step 3 needs to become step 5, and the first section should move down below the third? In Apple Notes, you can easily move lines, list items, and entire sections — without copying and pasting. Find out here how to effortlessly move text and rearrange sections in Apple Notes for Mac ⤓.
On This Page
How to Move Text and Rearrange Sections in Apple Notes for Mac
Time needed: 2 minutes
To quickly rearrange sections of text and list items or move text in a note with Apple Notes for Mac:
- Organize the text in your note hierarchically.
Here’s why: Notes lets you rearrange sections in addition to moving lines of text; this only works if text is laid out hierarchically.
Here’s how: Apply the heading and subheading style to appropriate headlines, for example, to create a hierarchy; use Bulleted List, Dashed List, Numbered List and Checklist for lists.
Notes 4.13 on macOS Tahoe: In notes on macOS Tahoe, rearranging items only works within lists. - Position the text cursor on a headline, line or list item.
Here’s where: You can put the cursor anywhere on the line.
- Press Command Control ⬆ (up) to move the line, item or section up and Command Control ⬇ (down) to move it down.
Here’s what happens: If the cursor is on a body line or on a list item, the item will move up or down one line (or spot); if the cursor is on a heading or subheading, the whole section (including all text in it up to the next heading or subheading) will move up or down.
Using the menu: You can also select Format | Move Item | Up and Format | Move Item | Down from the menu; clicking right on any line or section header, you can also use the context menu to move the item.
Their word: Apple include information on moving items within lists in the Notes User Guide.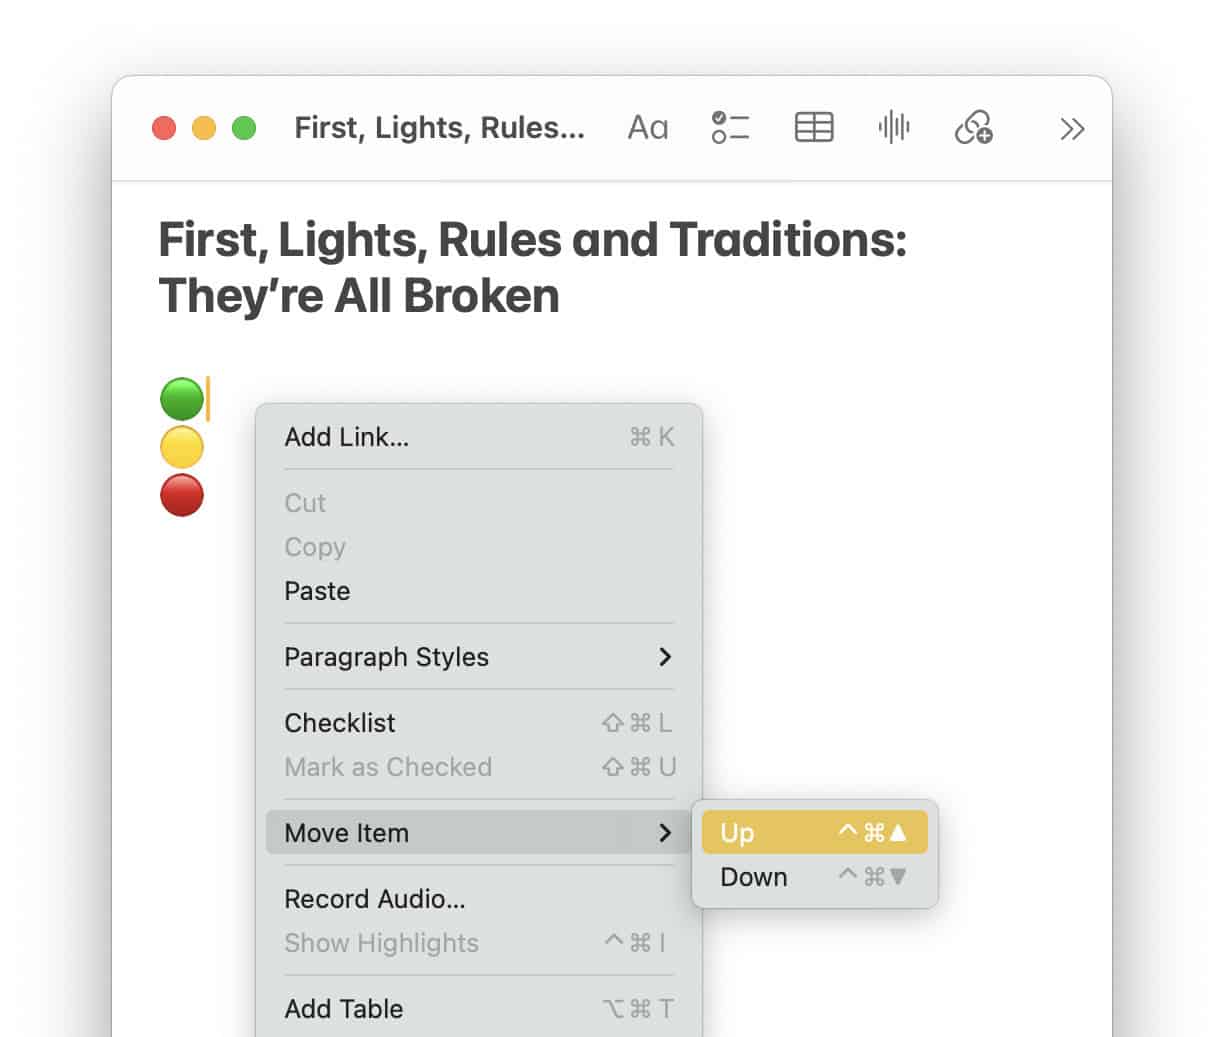
Smoothed out your sections?
Tips help fuel these email and tech how-tos.
What Can and Cannot Be Moved
| Can Be Moved | Cannot Be Moved |
|---|---|
| Body text | Table rows and columns |
| List items | Text in handwritten notes |
| Headings and subheadings | |
| Entire sections | |
| Images |
How to Move Text and Rearrange Sections in Apple Notes for Mac: FAQ
Can I rearrange sections in outline mode?
Yes.
Moving sections works when individual sections (or all sections in Apple Notes outline mode) are collapsed. The hidden parts move together with their section header.
Can I move images and drawings?
Yes.
Images move just like normal body text in Apple Notes for Mac.
Working on more than one note? How to Jump Between Recently Used Notes in Apple Notes
Can I move text in handwritten notes?
No.
Handwritten notes work like graphics in Apple Notes for Mac. You can move text around them, and they will move with body text if they appear under a heading.
Can I move items in tables?
No.
You can only select and move tables included in notes (as one line of body text). You cannot use moving items to swap rows in a table, though.
Can I move text and rearrange sections in Apple Notes for iOS or on the web at iCloud.com?
No, not the same effortless way you can on macOS.
To move text in Apple Notes on iPhone, iPad and the web at iCloud.com:
- Highlight text section of text you want to move.
iPhone and iPad: Double-tap a word to select it, then expand the selection using its handles.
Notes for iCloud.com: In Notes at iCloud.com, use the browser’s text selection tools to highlight. - Cut the highlighted text.
iPhone and iPad: Select Cut from the context menu.
iCloud.com: You can press Command Z (Mac) or Ctrl Z (Windows and Linux) to cut text, for example. - Position the text cursor where you want to insert the moved text.
- Paste the previously cut passage.
iPhone and iPad: Tap the spot where the moved section should appear, then select Paste from the context menu.
iCloud.com: Press Command V (Mac) or Ctrl V (Windows and Linux) to paste.
(Tested with Apple Notes 4.12–4.13 for Mac on macOS Tahoe 26 and Sequoia 14; first published May 2025, last updated June 2026)