

iCloud Mail likes to place a newsletter at the top of your primary inbox? A friend’s updates get lost under “Updates”? You are not at the mercy of iCloud Mail’s classifying whims, though: find out here how to (manually) classify a sender and have their emails sorted to a particular iCloud Mail inbox category ⤓.
On This Page
How to Classify a Sender for iCloud Mail Inbox Categories
Time needed: 1 minute
To change under which inbox category new emails from a sender will show up in iCloud Mail at iCloud.com:
- Open an email from the sender in one of the inbox categories.
Here‘s where: Open the email in Primary, Transactions, Updates or Promotions.
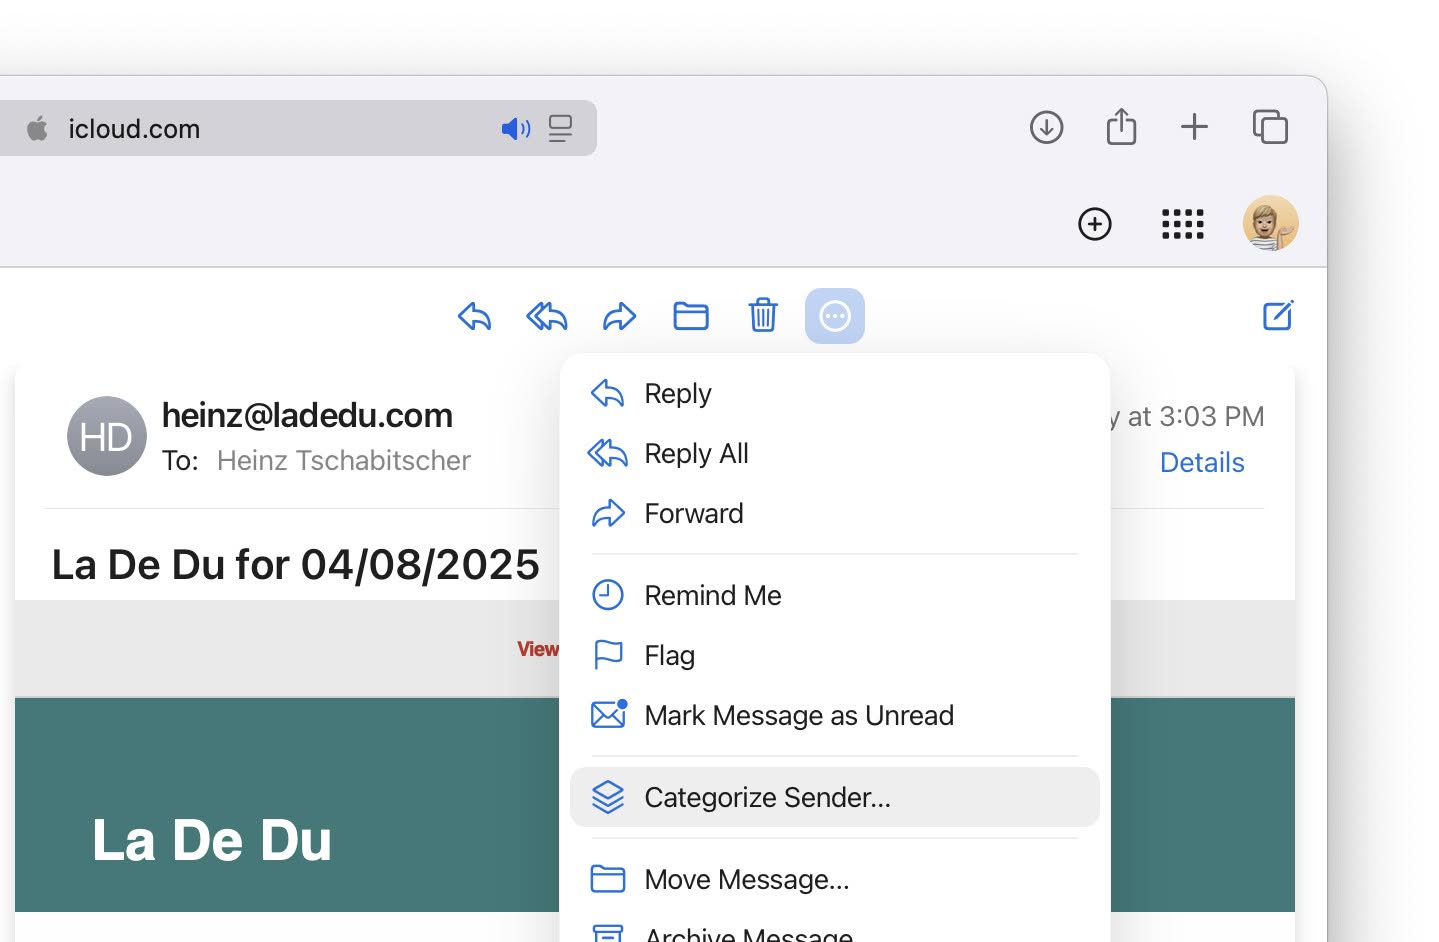
Here’s why: You can only change sender classification from within inbox categories; opening the email in a folder (or the top Inbox folder itself) will not let you pick categories. - Click the three dots (More actions) menu button in the message’s toolbar.
Context menu: You can also right click on the email in the message list or click the there dots menu that appears as you hover over a message in the list to open its context menu.
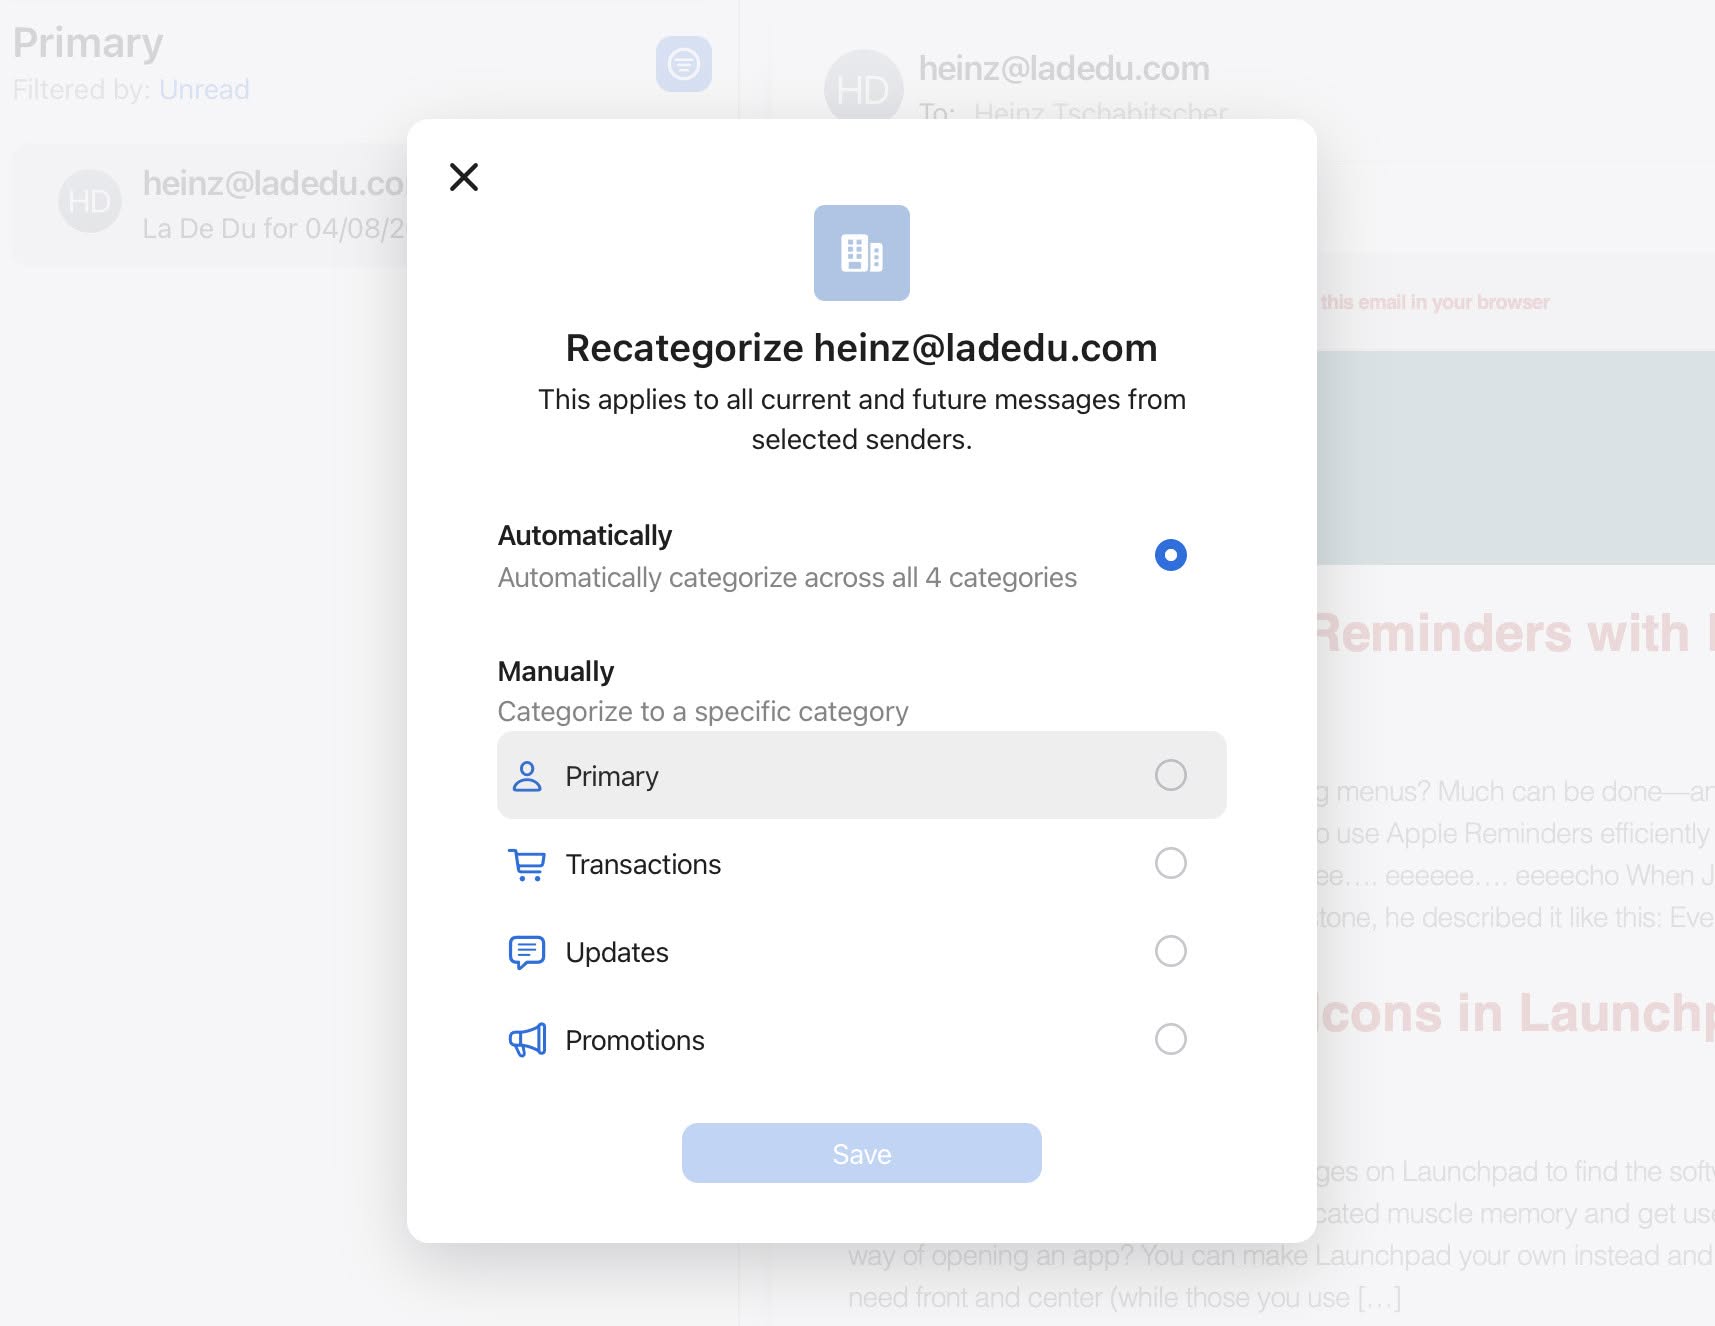
- Select Categorize Sender… from the menu that has appeared.

- Choose the inbox category to use for all emails from the sender under Manually.
Example: Choose Updates for a newsletter that habitually appears in your Primary inbox but is neither urgent nor important.
- Click Save.
Their word: Apple include information on using mail categories in the iCloud User Guide.

A kind of categorical imperative.
Tips help fuel these email and tech how-tos.
Reset or Change a Manual Sender Classification
To change an existing sender classification in iCloud Mail at iCloud.com:
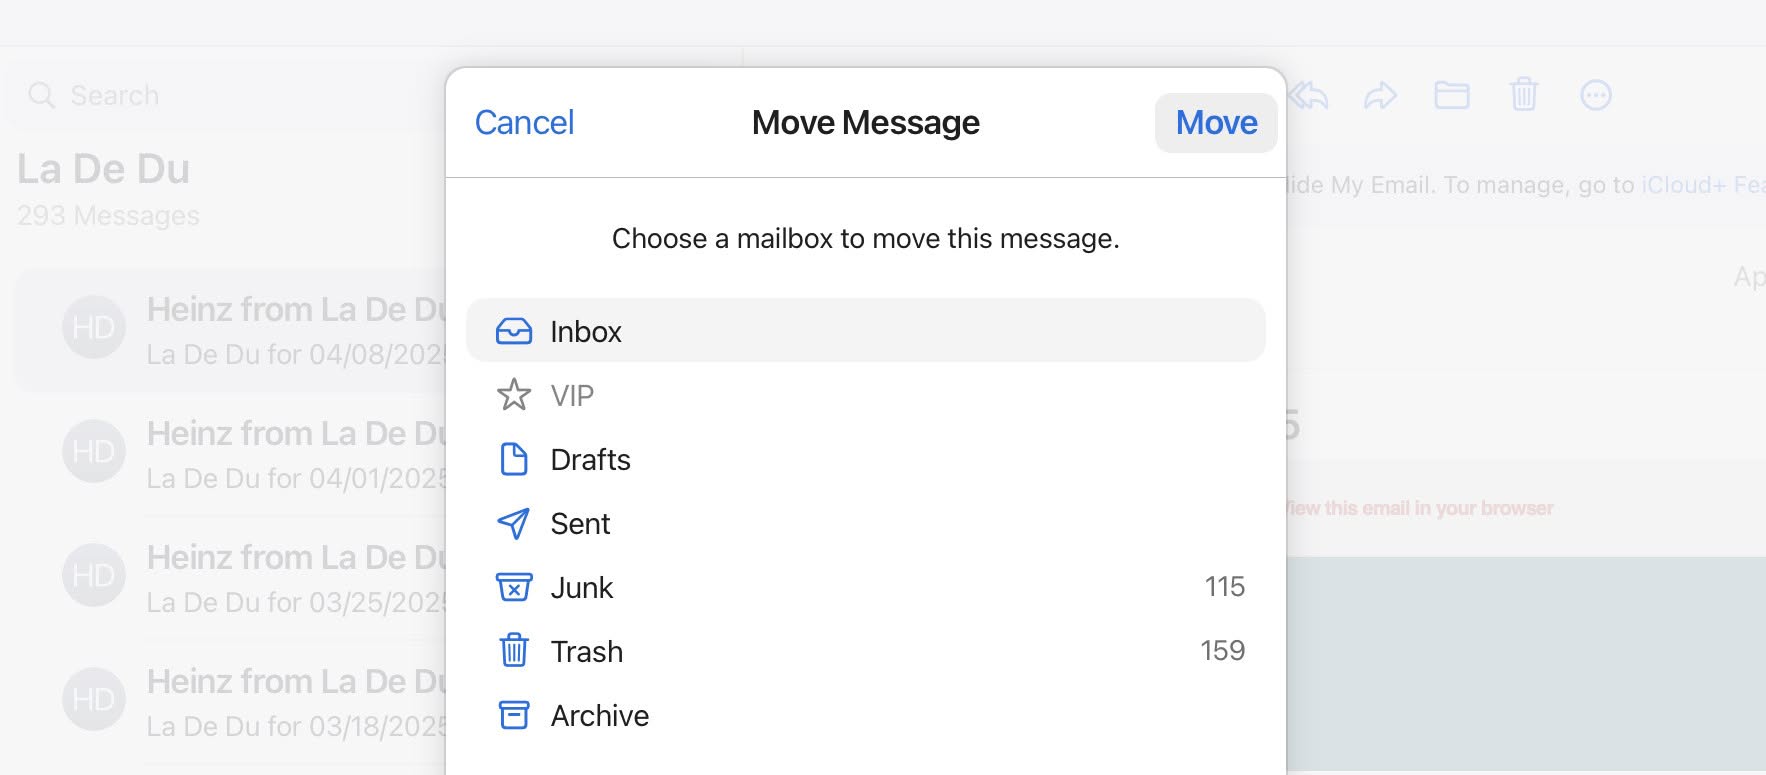
- Find and open an email from the sender.
- Move the email to the inbox (unless, of course, it is already in the inbox).
Here’s why: iCloud Mail lets you edit classifications only for messages in one of the inbox categories.
Here’s how: Open the email, click the Move Message button in the toolbar, select Inbox and click Move.
- Follow the steps above to change the category for the sender’s email address.
View everything no matter the category? How to See All Inbox Email Across Categories in iCloud Mail
Never gets it right? How to Disable or Hide iCloud Mail Inbox Categories
How to Classify a Sender for iCloud Mail Inbox Categories: FAQ
Will sender classifications synchronize to Mail on iPhone and Mac?
Yes.
Both the classification of emails and the sender information will synchronize to Apple Mail on iPhone and Apple Mail for Mac.
(First published April 2025, last updated May 2026)