 on Windows")
The code or formula needs curly brackets, and they are nowhere to be found on the keyboard? On Windows laptops especially, different layouts can hide ‘{’ and ‘}’ behind awkward key acrobatics. Find out here how to type curly brackets ( { } ) on Windows using the keyboard and emoji panel––whether you have a US layout, a European keyboard or no dedicated key at all.
First, Eating Cheese Like Soup
Today, we’re spooning cheese like a soup, and we are not in Switzerland.
For it is the custom, a Farmer’s Bulletin titled Cheese and Its Economical Uses in the Diet informs us, in the Netherlands to cut the top off of large, round, red and Edam cheese loaves. The cheese inside is then carved out (with a spoon, I suppose) as needed. The cut-off portion is put back on as a lid.
Now… want to put a metaphorical lid on parts of text — or spaghetti code, perhaps?
How to Type Curly Brackets ( { } ) on Windows
Typing Curly Braces on a US-English Keyboard
Time needed: 2 minutes
To insert curly brackets ( { } ) with the keyboard on Windows:
- Position the text cursor where you want the opening or closing curly bracket to appear.
Here’s where: Curly braces are not usually a part of English-language text. You can employ them to unite lines (so that one attribute applies to more than one item, for example) if you insert braces that span multiple lines (see below). If you use curly brackets in regular text, position them like you use parentheses — with whitespace on their outside but not inside.
Programming: In source code, go with the convention used in the existing codebase and rely on what comes naturally to your editor or what you prefer for new projects. - Press Shift [ (square opening bracket) for the curly opening bracket ‘{’ and Shift ] (square closing bracket) for the closing curly bracket ‘}’.
Keyboard layouts: The key combination above works for the US-English keyboard layout.
Finding Curly Brackets for Your Keyboard Layout
To find the key combination that will produce opening and closing curly brackets with your Windows keyboard layout:
- Open the Windows on-screen keyboard.
Here’s how: Press Ctrl O to open the on-screen keyboard (if the keyboard shortcut is enabled in Windows Accessibility settings). - Look for { or } on the keys themselves.
Found it: Press the corresponding key to insert the opening or closing curly bracket. - Look for { or } in the keys’s top left corners.
Found it: Press Shift together with the key to insert{or}respectively. - Press and hold the AltGr key.
- Look for { and } again on keys.
Found it: Press AltGr together with the corresponding key to insert{or}. - Press and hold AltGr and Shift together.
- Again, look for { and }.
Found it: If you found the opening or closing curly bracket on any of the keys, press the key together with AltGr and Shift to insert the character.
Inserting Curly Brackets Using the Windows Emoji Panel
To input opening or closing curly braces using the emoji panel on Windows:
- Put the text cursor where you want to insert the opening or closing curly bracket.
- Bring up the Windows emoji panel.
Here’s how: Press Windows . (period) to use the emoji keyboard shortcut. - Click or tap Symbols (%⟳△+ on Windows 11 and Ω on Windows 10).
- Double-click { and } in the General punctuation section to insert them.

It’s got an emoji pane, too: How to Insert Curly Brackets ( { } ) on a Mac
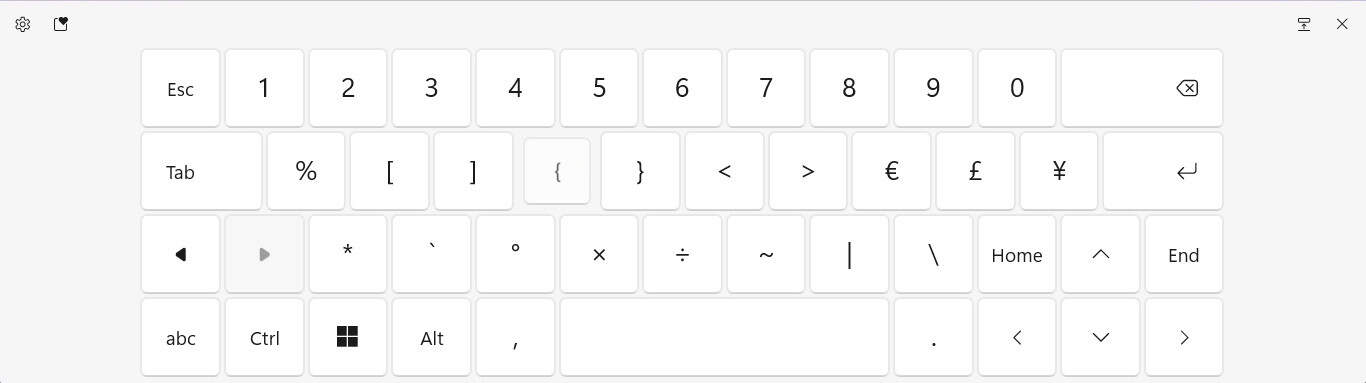
Type Curly Braces on the Windows Touch Keyboard
To use the Windows touch keyboard for inserting curly brackets:
- Tap &123 on the touch keyboard.
Layout: Choose the default layout for the touch keyboard using Keyboard layout | Default from the settings gear menu. - Now select the right-pointed arrowhead (▶).
- Tap { and } to insert curly brackets.
How to Type Curly Brackets on Windows: FAQ
Can I copy and paste curly braces?
Yes.
You can copy the left and right curly brackets in the table below for pasting anywhere on Windows:
opening curly bracket { | |
closing curly bracket } |
Can I use curly braces over multiple lines?
Yes.
In a controlled, fixed-width text environment, you can use Unicode characters that let you extend curly brackets vertically to span multiple lines. These brackets let you unite lines or itemize.
To use curly brackets spanning multiple lines, copy the elements from the table below and combine them as needed:
left top or right bottom ⎰ | |
left bottom or right top ⎱ |
left curly bracket top ⎧ | |
right curly bracket top ⎫ |
curly bracket extension ⎪ |
left curly bracket center ⎨ | |
right curly bracket center ⎬ |
curly bracket extension ⎪ |
left curly bracket bottom ⎩ | |
right curly bracket bottom ⎭ |
Multiple Line-Spanning Curly Bracket Example
        ⎧  √4 =  2
x - 1 = ⎨
        ⎩ -√4 = -2
(Tested with Windows 11 Version 24h2; first published February 2025, last updated December 2025)