 on a Mac")
For the code you write or the math you transcribe, you need curly brackets — and they are nowhere to be found on the keyboard? Find out here how to insert curly brackets ( { } ) on a Mac ⤓ — using keyboard shortcuts, Character Viewer and even Unicode for multi-line brackets.
On This Page
How to Type Curly Brackets ( { } ) on a Mac
Time needed: 1 minute
To type curly brackets (the braces { } ) on a Mac using the US-English keyboard layout:
- Position the text cursor where you want to place the opening or closing curly bracket.
Here’s where: In normal flowing text you will rarely employ curly brackets or braces, of course; if you do, use them like normal parentheses with whitespace before the opening and after the closing brace but no whitespace within.
Joining: If your editor allows it, you can use braces, especially closing braces for uniting lines (see below for an example).
Coding: Curly brackets are everywhere in programming, of course; their placement at the beginning or end of lines as well as the the whitespace around them are mostly a matter of personal, aesthetic and practical choice. In an existing project, follow the style already employed, otherwise go with what comes naturally to your editor or set it up to follow your preferred style. - Press Shift [ (square bracket) for the opening curly bracket and Shift ] for the closing curly bracket.
Non-US keyboard: The keyboard shortcut above works for US-English keyboards; see below for finding the key combination to insert curly brackets with other keyboard layouts.
All {curled} up and cozy with your brackets now?
Tips help fuel these email and tech how-tos.
Find the Curly Bracket Key Combination for Your Keyboard Layout
To discover the combination of keys that will insert curly brackets on your Mac’s keyboard:
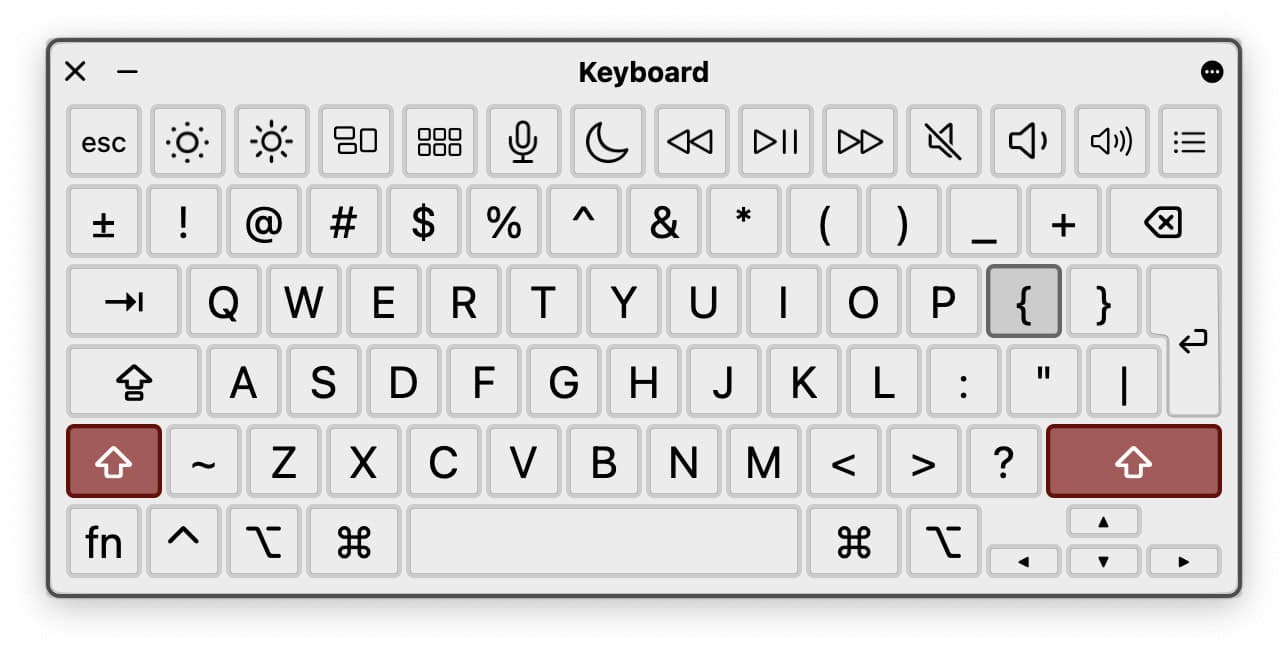
- Open Keyboard Viewer.
- Look for angle brackets in the top left corner of keys; you can then reach them pressing Shift and these characters.
- Press the Option key.
- Look for the braces on the keys themselves or, again, in the top left corner; if they are in the corner, Option Shift and the respective keys will insert the curly brackets.
Their word: Apple include information on Character Viewer in the Mac User Guide.
Wish the cursor would not blink? How to Turn Off Cursor Blinking on a Mac
Curly Bracket Mac Keyboard Shortcut Examples
| Keyboard Layout | Opening Brace { | Closing Brace } |
|---|---|---|
| Spanish | { or Option ´ | } or Option ç |
| French | Option ( | Option ) |
| Japanese Kana | Option Shift ゛ | Option Shift む |
| German | Option 8 | Option 9 |
| Russian | Option 9 | Option 0 |
Using Windows? How to Type Curly Brackets on Windows
Insert Curly Brackets with Mac Character Viewer or Emoji Panel
To insert curly brackets with the Mac Character Viewer or emoji panel:
- Put the text cursor where you want to insert the opening or closing brace.
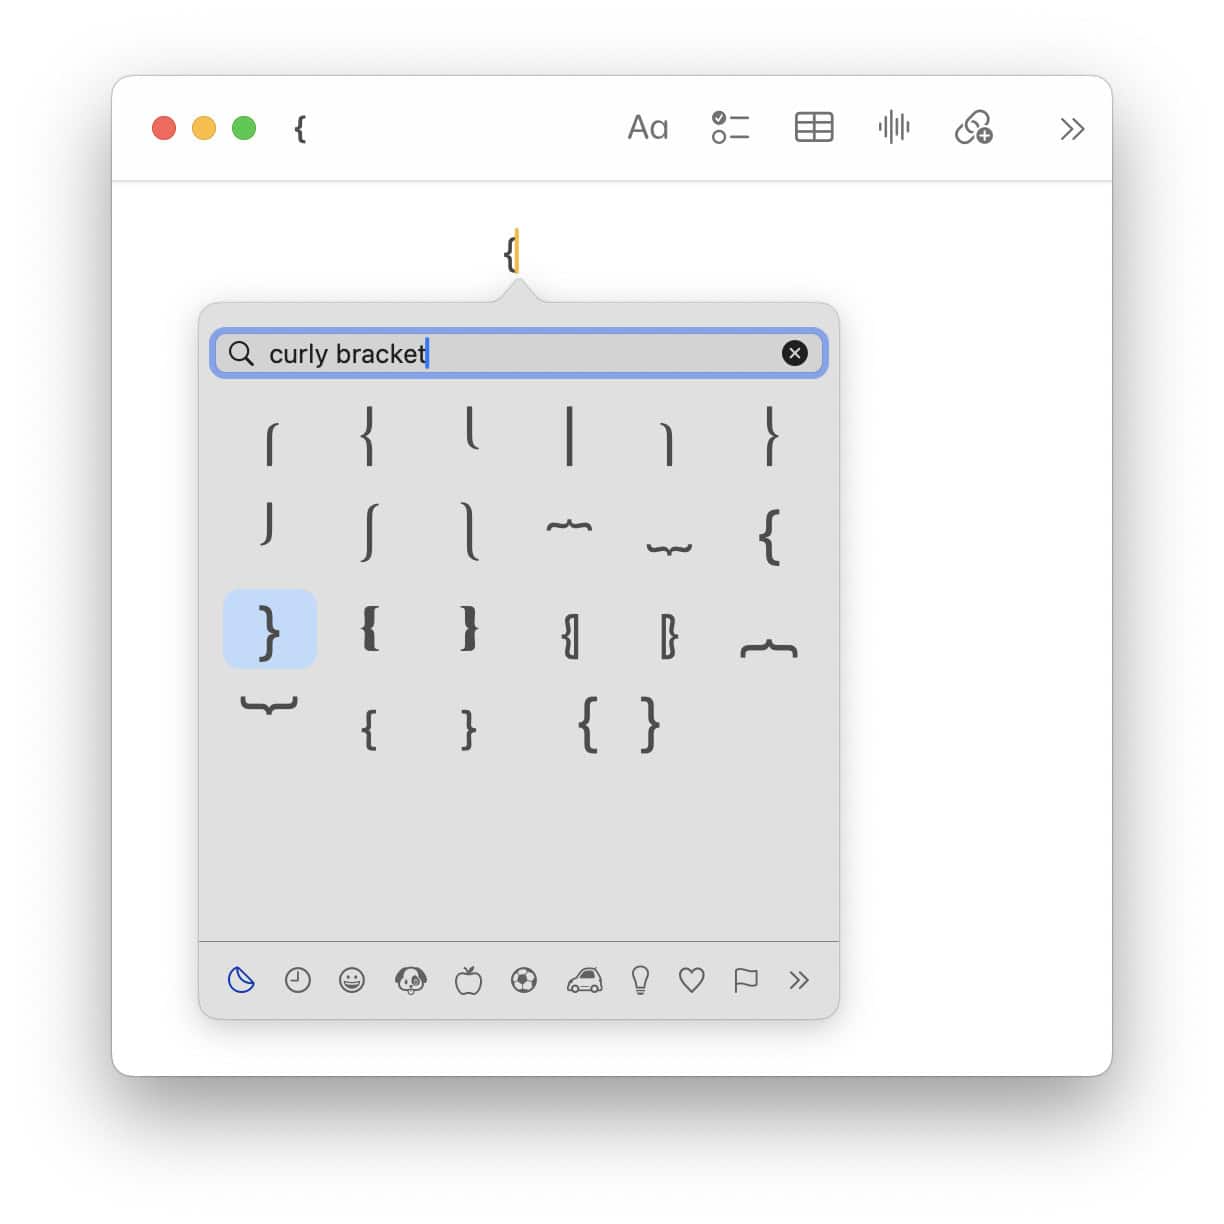
- Select Edit | Emoji & Symbols from the menu.
Mac keyboard shortcut: You can press Fn E or 🌐︎ to open the emoji panel or Character Viewer. - Search for
curly bracket.
Parentheses: In Character Viewer, you can also open the Parentheses category. - Double-click the LEFT CURLY BRACKET and RIGHT CURLY BRACKET characters respectively to insert them.
How to Type Curly Brackets ( {} ) on a Mac: FAQ
Can I use Unicode to insert curly brackets?
Yes.
You can add brackets anywhere in macOS using Unicode:
- Turn on Unicode Hex Input on the Mac.
- Press and hold the Option key.
- Type 0 0 7 B for { and
type 0 0 7 D for }. - Release Option.
Can I copy and paste braces?
Yes, naturally.
If there is no way locating curly brackets on your keyboard, you can easily copy them using the table below. The full-width variants add whitespace on the outside of the bracket.
left curly bracket { | |
right curly bracket } |
full-width left curly bracket { | |
full-width right curly bracket } |
Can I insert curly braces that span multiple lines?
Yes, to some degree.
Unicode includes characters that let you extend curly braces beyond one and over multiple lines (if you can arrange for them to appear directly above each other with limited line height beyond the characters themselves). Using this arrangement, you can use curly braces for their original purpose of collecting or uniting items.
You can copy the characters below to compose something like the following example:
 tetrahedron ⎫
        cube ⎪
  octahedron ⎬ Platonic shape
dodecahedron ⎪
 icosahedron ⎭
left curly bracket top ⎧ | |
right curly bracket top ⎫ |
curly bracket extension ⎪ |
left curly bracket center ⎨ | |
right curly bracket center ⎬ |
curly bracket extension ⎪ |
left curly bracket bottom ⎩ | |
right curly bracket bottom ⎭ |
You can also have the curly braces extend over two lines:
left top or right bottom ⎰ | |
left bottom or right top ⎱ |
(Tested with macOS Tahoe 26.0–26.3 and Sequoia 15.3–15.5; first published December 2024, last updated March 2026)