

[Archived] Have a large image to share? Use the tool at hand to make its size bearable: find out below how to resize an image in Paint 3D ⤓ for Windows.
On This Page
How to Resize an Image in Paint 3D
This is an archived article.
Using MS Paint? How to resize an image in Paint
Time needed: 3 minutes
To quickly change the size of an image (so it will perfectly fit an email signature, for instance) in Paint 3D on Windows:
- Open the image you want to resize in Paint 3D.
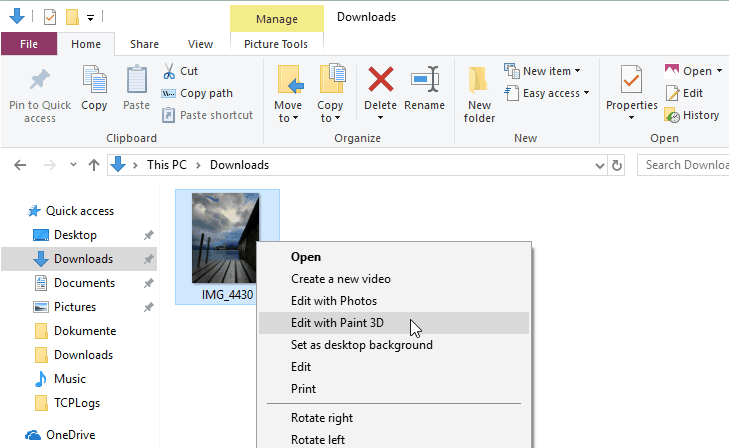
Here’s how: Click on the image with the right mouse button and select Edit with Paint 3D from the context menu that has appeared.
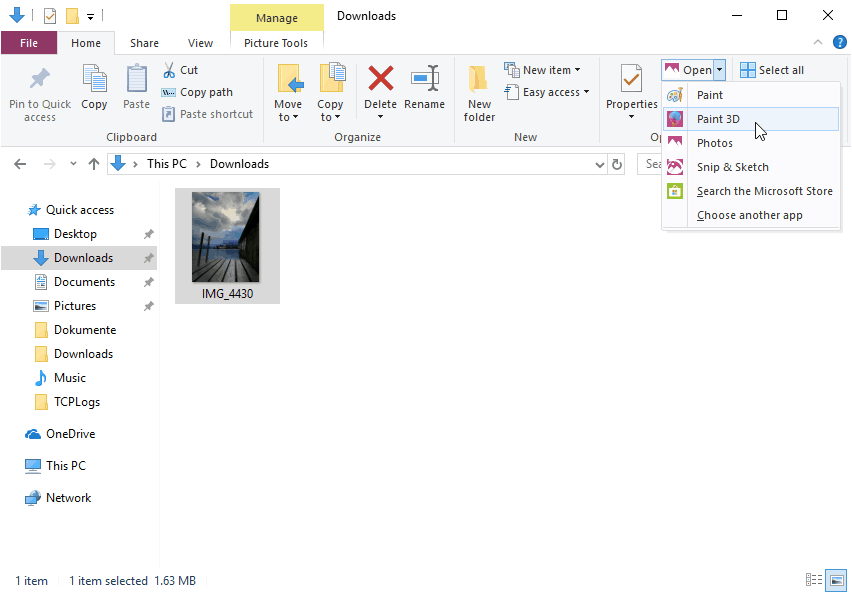
Alternative: You can also highlight the image and select Open | Paint 3D from the Open section of the Home ribbon in Windows Explorer. - Click Canvas.
Paint 3D keyboard shortcut: You can also press Alt C to open the canvas options.

- In the sidebar, check Resize image with canvas.
No sidebar: If you do not see the sidebar click the Canvas icon in the sidebar or press M. The entry in the sidebar may also read When resizing the canvas, adjust my image as well.
All sidebar: You can also have the sidebar permanently expanded in Paint 3D.
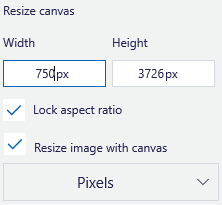
Crop: Want to focus your image before resizing it? You can cut rectangles and squares or even crop a circle in Paint 3D. - Check Lock aspect ratio as well (under Resize canvas).
- Finally, select Pixels under Resize canvas.
- Enter the maximum height or width under Height and Width respectively.
Note: The numbers are connected so the ratio of width to height stays the same. If you change one, the other automatically adapts to it.
Tip: Watch both numbers, and if one exceeds your desired maximum size, switch to it and enter the maximum there.
Example: You are resizing an image for your signature. The image should not to exceed 100 pixels in width, and you don’t want it be higher than 95 pixels. The image’s original size is 2448 × 3264 pixels.
After you enter "100" as the new width, the height changes to "133". That is too large, so you enter "95" under Height instead, and resize the image to 71 × 95 pixels.
- Click the menu button.
- Select Save.

The other "resize": Want to optimize the image for use online? Find the best online image compression tools here.
How to Resize an Image in Paint 3D: FAQ
How do I change a picture to 8x10 or passport size photos in Paint 3D?
To make a photo fit your aspect ratio and proportions (say, passport or 8x10 inches):
- Cut the photo in the correct and desired proportions.
- Possibly rescale the image using the steps above to make it smaller for sharing or use on the web.
Can I blur an image in Paint 3D?
No.
There is, alas, currently no straightforward way to add (Gaussian) blur to an image in Paint 3D.
For a somewhat blurry and pixelated look, you can
- reduce the image size in pixels to, say, 10% and then
- resize the image to its original size.
(Tested with Paint 3D 6.1907–6.2310 for Windows 10 and Windows 11; first published December 2017, last updated July 2024)