
Got a PDF to share, but some text (or images) have to stay private? Find out here how to redact text and images in a PDF file with Preview on a Mac ⤓.
On This Page
How to Redact Text in a PDF with Mac Preview
Time needed: 3 minutes
To redact text in a PDF document (replacing it with a black bar) using macOS Preview on a Mac:
- Open the PDF file with the text you want to blacken out in Preview.
Here’s how: You can click on the file with the right mouse button, for instance, and select Open With | Preview from the menu that has appeared.
By default: You can also make Preview the default app for PDF files. - Click Show Markup Toolbar in the standard Preview toolbar.
Menu: You can also select View | Show Markup Toolbar from the menu.
Preview keyboard shortcut: To show the markup toolbar quickly, press Command Shift A. - Select Redact in the markup toolbar.
Using the menu: Select Tools | Redact from the menu to select the redacting tool (even without the markup toolbar).
- Click OK for Redacted content is permanently removed if the informational dialog appears.
- Use the mouse cursor to select the text you want to redact and black out.

- Select File | Save or File | Export… to save a the PDF file with the redacted text unrecoverable.
Their word: Apple include information on redacting text in the Preview User Guide.
?
Tips help fuel these email and tech how-tos.
Blacken Out Text That Cannot Be Selected or Parts of Images
To blacken out any part of a PDF document, including text that you cannot select and images:
- Open the PDF document in Preview.
- Show the markup toolbar. (See above.)
- Select Redact.
- Click and drag to create a rectangle that will blacken out part of the image.
Square: Hold down Shift while you drag to create a square.
Changes: Click the redaction square and use its blue handles to change its size afterwards, or use the hand pointer that appears over it to drag it to a different location.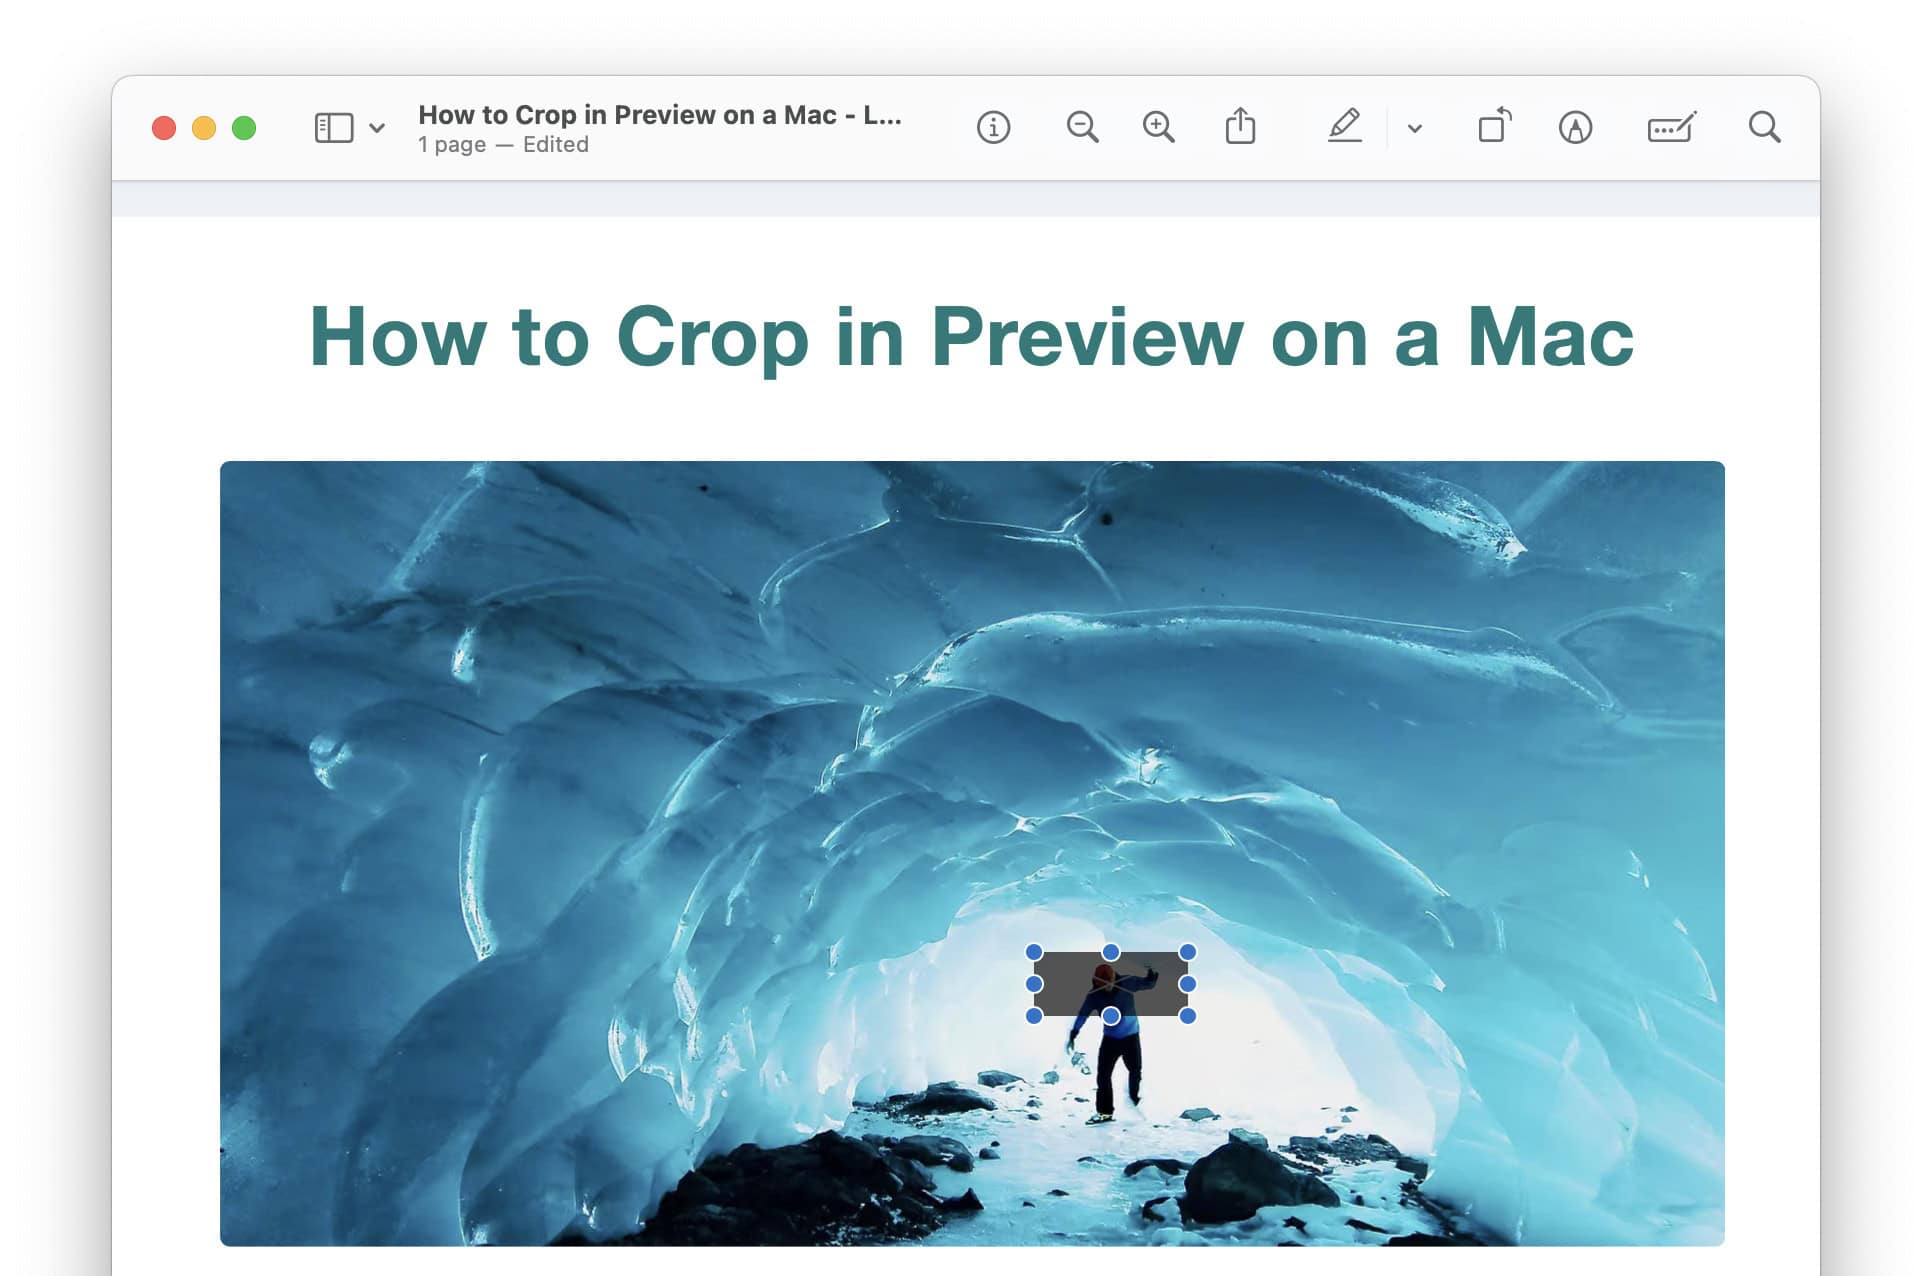
- Select File | Save or File | Export… to save.
Putting color in the back instead of black in the front: How to Highlight Text in Preview on a Mac
“Adding” text instead of “removing” it: How to Add a Note to a PDF File in Mac Preview
How to Redact Text in a PDF with Mac Preview: FAQ
Can I undo redacting text?
Yes.
You can undo blackening out text until you save the PDF.
To undo a text redaction in Preview:
- Click on the redacted text with the right mouse button.
Take a peek: As you move the cursor over the blackened text, the contents will shine trough; this effect will, of course, not be in the saved copy. - Select Remove Redaction from the menu.

To undo an image redaction:
- Click the image redaction to select it; its blue handles will appear.
- Press Del or Backspace.
Can I remove a redaction after saving and re-opening the PDF?
No.
You cannot edit or remove individual text redactions after the file has been saved.
You can restore restore the file to an earlier state, of course:
- Select File | Revert To | Browse All Versions… from the menu in Preview with the PDF open.
- Restore the most recent version that has the redaction removed.
Can I also redact with a black rectangle?
Rather not.
You can, of course, cover any part of a PDF document with a black rectangle to make it invisible and illegible.
Important : While the text or other content is superficially invisible, it is not removed from the PDF document and can possibly be recovered.
(Tested with macOS Tahoe 26 and Sequoia 15 and Sonoma 14; first published December 2023, last updated June 2026)