
Want to set up your own mailing list or email a group frequently? Find out here how to create a newsletter in Gmail using Contacts and even have a welcome message sent automatically.
First, a Supersonic Gap Appears
The Concorde famously flew supersonic, loud and — hot.
During each flight, the whole airplane would stretch and slits appear where none had been before. The flight engineer (the last, by the by, on a commercial airplane at the time) could conveniently put his hand in one, for instance, but only during flight.
Want to stretch Gmail’s abilities a bit, too, and set up a mailing list in it? Let’s get flying:
How to Create a Newsletter in Gmail
Time needed: 15 minutes
To set up a mailing list for sending a newsletter in Gmail:
- Open Google Contacts.
Gmail keyboard shortcut: In Gmail, you can press G followed by C to open Google Contacts in a separate tab or window.
- Click Create label under Labels in the sidebar.
No sidebar: Click the hamburger Main menu button in Google Contacts’ top left corner to open the sidebar.
No Create label: Click Labels to access Create label.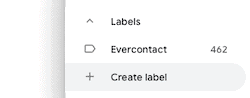
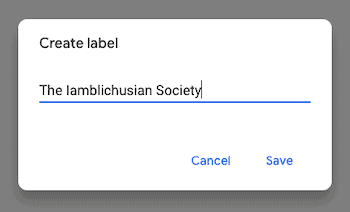
- Type the name for your newsletter.
- Click Save.
- Add recipients to your Gmail newsletter. (See below.)
- Send a message to your newsletter recipients.
How to Add Recipients to a Newsletter in Gmail
Add Existing (or New) Contacts
To add a contact to your Gmail newsletter:
- Go to Google Contacts.
- Optionally, search for the contact or email address using the Search field.
- Click the three dots (More actions) menu for the contact.
- Select the Gmail newsletter label you created.
Important: Do ensure you have permission to send bulk email.
Which address? For contacts with more than one address, Gmail will use the first (topmost) one listed when you send a newsletter. To add a different address to the list, do create a separate contact with just that address and add it instead.
To add more than one contact in one go:
- Check all contacts you want to add to the newsletter.
Find recipients: You can use search, of course, to limit the selection. - Click Manage labels.
- Check the label for the newsletter.
- Click Apply.
Add a Recipient from an Email
To add an email sender to a newsletter you have created in Gmail:
- Open an email from the sender you want to add.
Some automation: See below for setting up a special address in Gmail and automate part of the process. - Hover over the sender’s name or email address with the mouse cursor.
- Click Add to Contacts.
Note: If the sender is already in your Google Contacts, skip this step.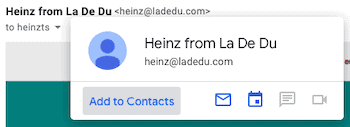
- Now click Edit Contact.
- In Google Contacts, click No Label.
Already labeled: For an existing contact already labeled, click the label (if it’s just one) or __ Labels. - Check the newsletter’s label.
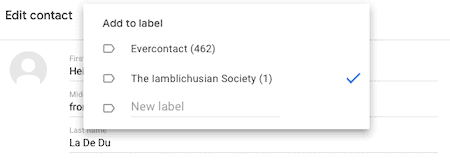
- Click outside the label editor.
- Now click Save.
Send New Subscribers a Welcome Email Automatically (and Make Your Life Easier Adding Them)
To set up Gmail to welcome people as they email a special “subscription” address and let you add them to your Gmail newsletter easily:
- Set up a Gmail autoresponder complete with alias address and auto-reply with the following differences:
- In addition to Send template, check Apply the label when you pick actions for the autoresponder rule.
- Click Choose label….
- Now, typically, pick New label…
- Name the label for new newsletter subscriptions so that you can easily recognize it.
- Click Create.
As emails arrive with the newsletter subscription label:
- Add their senders to your Gmail newsletter.
- Remove the label from the email.
How to Create a Newsletter in Gmail: FAQ
Can I set up a Gmail newsletter on an Android phone or iPhone?
Yes.
To create a newsletter in Gmail on your phone:
- Open Google Contacts in your preferred browser.
- Follow the steps above.
(How to create a newsletter in Gmail tested in a desktop browser; first published July 2020, last updated April 2025)