

Want to share a screenshot — but not necessarily all the information in it? Find out here how to redact text in a screenshot with Snipping Tool ⤓ on Windows (and black out email addresses or phone numbers, for example).
On This Page
First, Framing Others with Skill
Subjects get more interesting as they approach frames in a photo — or overlap them even. A frame can be the image’s border, of course, but also one seen and constructed inside the photo itself (such as classically a doorway, a tree’s branching arms reaching down or a clever cover of clouds perhaps).
Use proximity to these frames and overlapping them to distribute importance (and your viewers’ attention), and your pictures will improve markedly, I am told.
Now, want to draw frames of attention to hide a subject (verb, object, adverb or adjective)?
How to Redact and Black Out Text in a Screenshot with Windows Snipping Tool
Time needed: 2 minutes
To blacken out or redact parts of text in screenshot using Snipping Tool on Windows 11:
- Take the screenshot using Snipping Tool on Windows.
- Select Text actions in the Snipping Tool toolbar.
Missing keyboard shortcut: Text actions, a bit oddly, has no keyboard shortcut assigned in Snipping Tool.
- Wait for Snipping Tool to parse the text.
What’s going on: Using character recognition, Snipping Tool looks for parts of the image that resemble text.
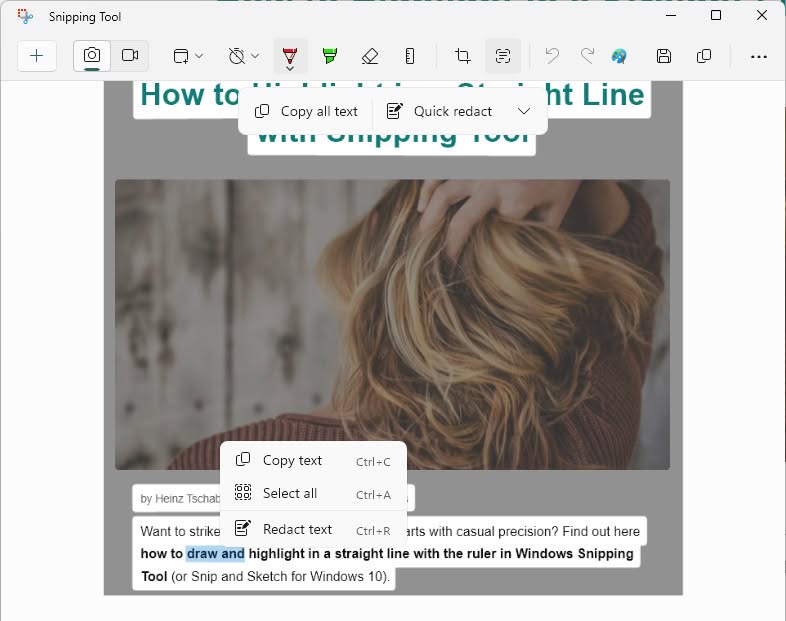
- Using the mouse, highlight the characters or words you want to blacken out.
- Click on the highlighted text with the right mouse button.
- Select Redact text from the menu that has appeared.
Snipping Tool keyboard shortcut: You can also press Ctrl R to redact a text selection.

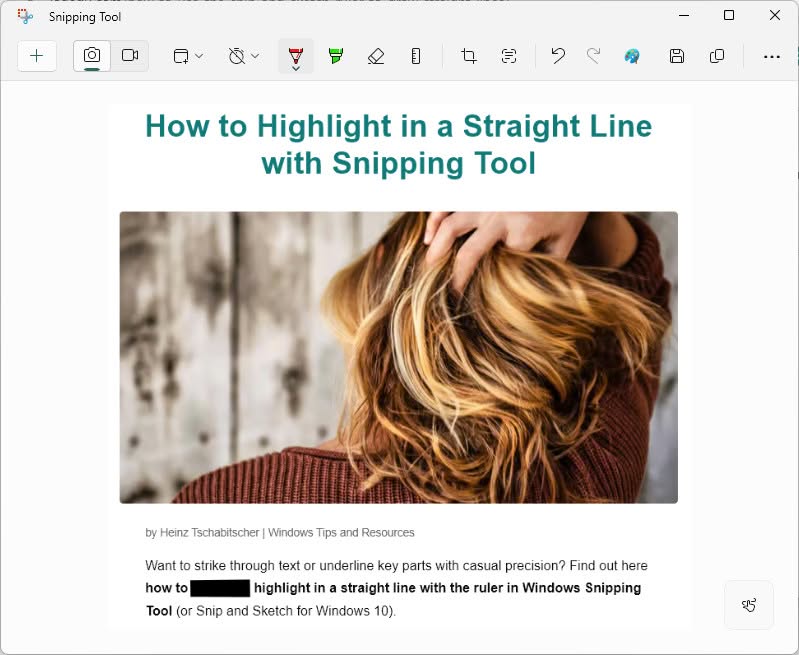
- Save the screenshot with its text redacted in Snipping Tool.
Ready to use: You can also copy the screenshot to the clipboard, of course.
Their word: Microsoft include rudimentary information on redacting text in screenshots with Snipping Tool help.
Redaction–action taken?
Tips help fuel these email and tech how-tos.
Quickly Redact Phone Numbers and Email Addresses in Screenshots
To scan a screenshot for email addresses or phone numbers in Snipping Tool and replace them with black bars so they cannot be read:
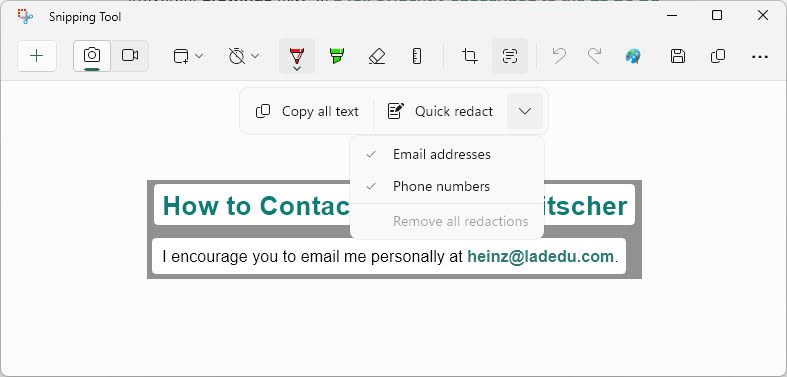
- Click Text actions in the Snipping Tool toolbar.
- Click the downward-pointing caret next to Quick redact.
- Select Email addresses, Phone numbers or both to be blacked out.
- Now click Quick redact.

How to Redact and Black Out Text in a Screenshot with Windows Snipping Tool: FAQ
Can I undo blackening out text?
Yes.
To und an individual redaction immediately:
- Press Ctrl Z.
Quick redactions: This works also for blackening out email addresses and phone numbers.
To undo multiple redactions and make all text visible again:
- Select Text actions in Snipping Tool.
- Click the downward-pointed caret next to Quick redact.
- Select Remove all redactions from the menu.
Can I black out text that I cannot select or other parts of an image?
Yes, to some degree.
To blacken out any part of a screenshot in Snipping Tool:
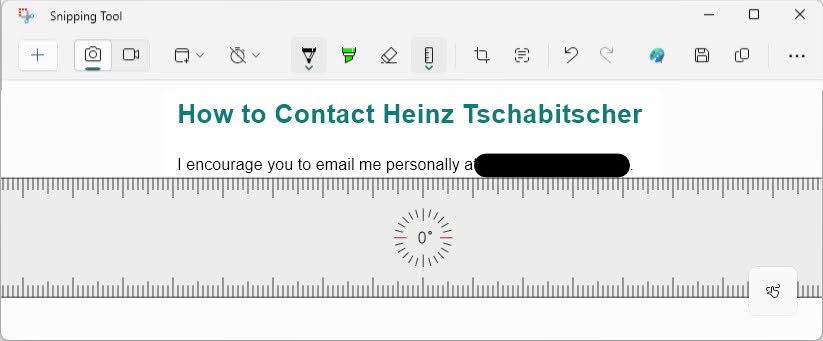
- Select the Ballpoint pen tool in the toolbar.
- Set the color to black.
- Pick a size that either covers the complete height or width of what you want to redact — or the largest pen size.
- Draw one or more straight lines to blacken out the unwanted part of the image.
Caution : This covers the parts of the image with black color. Information in it will not be easily recoverable, but the redaction is not guaranteed, and text or other information may be restorable, e.g. with .
(Tested with Snipping Tool 11.2310–11.2519 on Windows 11; first published December 2023, last updated February 2026)