

Need to snip the background off an image so you can insert a company badge into a report or paste a product picture into a new scene? Find out here how to make an image background transparent on a Mac ⤓ using Preview.
On This Page
How to Make an Image Background Transparent on a Mac Using Preview
Using AI-Powered “Remove Background” (Easy)
To have Preview for Mac identify and remove the image background automatically using AI:
- Open the image in Preview.
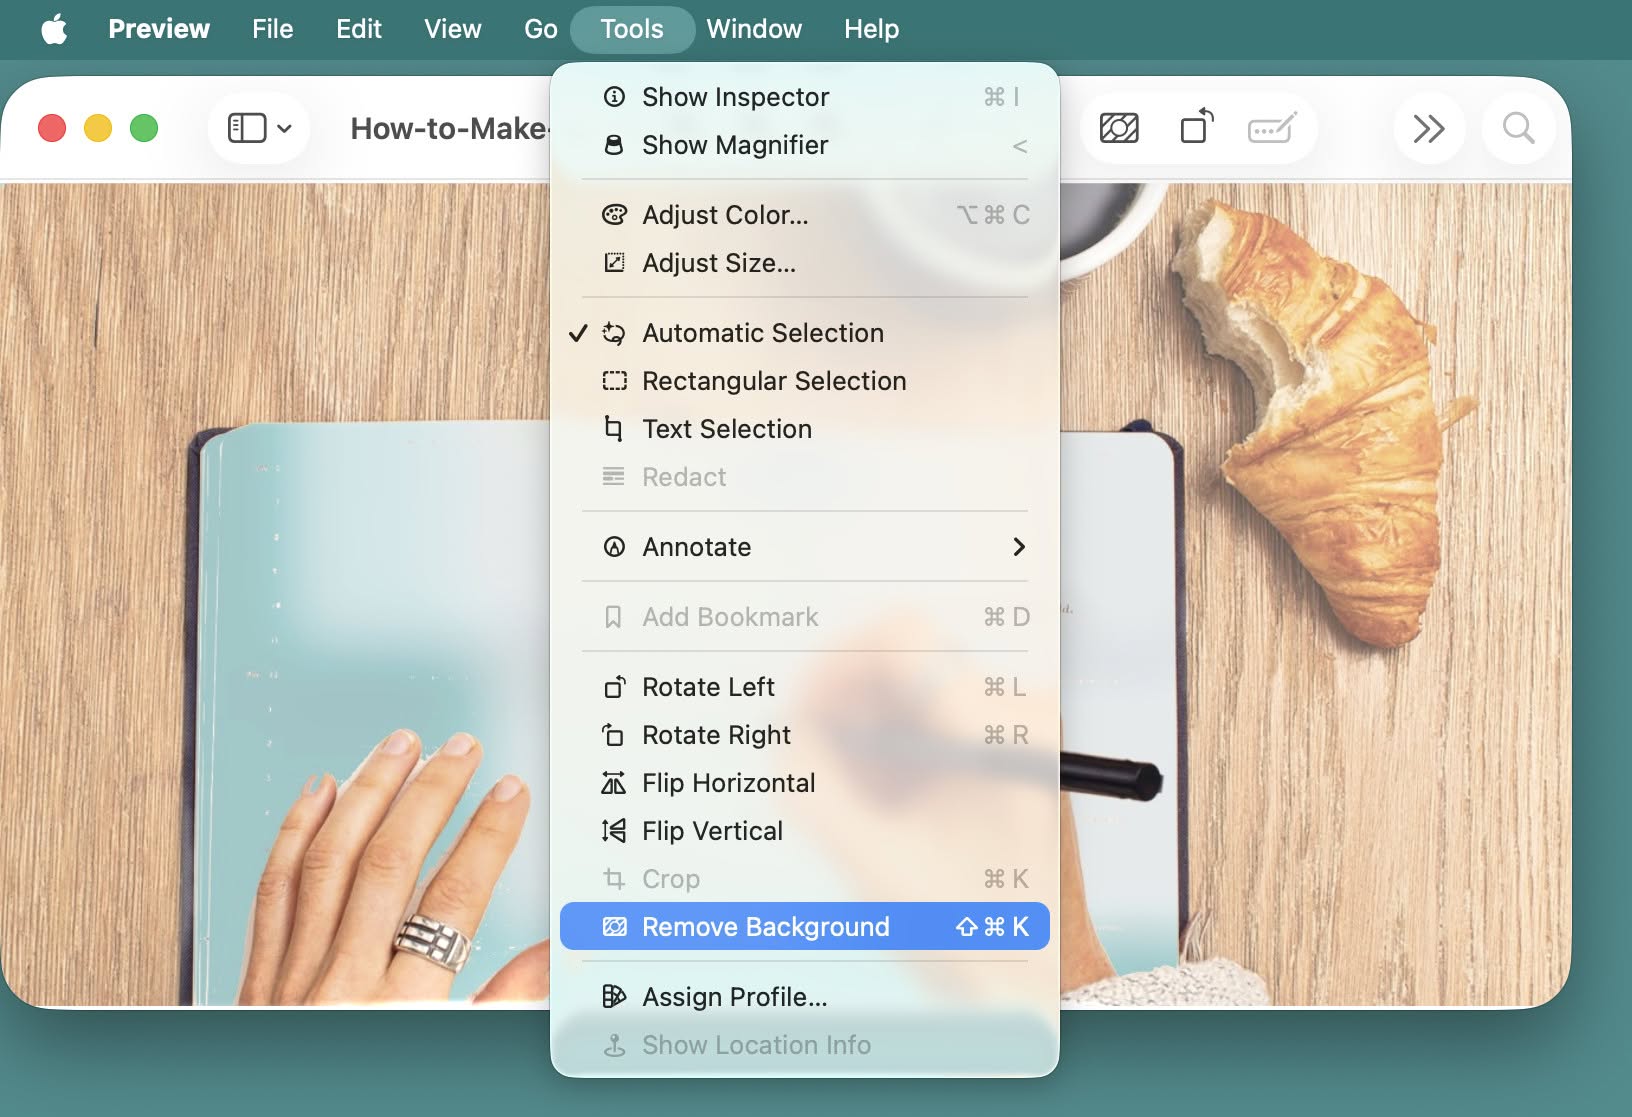
- Click Tools in the toolbar.
- Hover the mouse cursor over Remove Background.
Here’s why: If you hover the mouse cursor over the menu item, you will get a preview of what will be removed; if you are not happy with it, see below for making a manual selection.
- Select Remove Background.
Using the toolbar: You can also click Remove Background in the main toolbar.
Preview keyboard shortcut: To instantly remove the background, press Command Shift K. - Choose Convert if you are asked to convert the image to PNG.
Here’s why: Not all image formats offer translucency; if you are editing such an image, Preview offers to convert to the PNG format, which does support translucency and saves without losing information. - Save the image preserving alpha information; see below.
Using Manual Background Selection (Flexible)
Time needed: 4 minutes
To add translucency to an image using the Preview app built into any Mac:
- Show the Markup toolbar in Preview.
Here’s how: Click the Show Markup Toolbar button in the Preview toolbar so it is enabled.
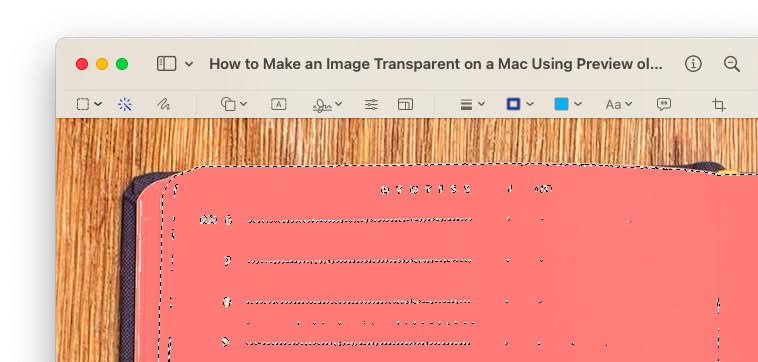
Preview keyboard shortcut: Press Command Shift A to toggle the markup toolbar. - Click Instant Alpha in the markup toolbar.
- Click (and hold) in a part of the image you want to make transparent.
- Drag in any direction from the origin to progressively add (less and less similar) adjacent colors to the selection.
Undo: Drag back in the direction of the selection’s origin to remove colors.

- Let go of the mouse cursor.
- With the marching ants selection visible, press Del or Backspace.
Convert to PNG: If you edit an image in a format that does not support transparency (such as a JPEG image, for instance), Preview offers to convert the image to PNG (which does support alpha channel opacity); click Convert.
- Repeat steps 2–6 to make more parts of the image transparent as desired.
- Optional: Use the rectangular or lasso selection tool to highlight and delete pieces you missed with Instant Alpha.
- Save the image.
Alpha: To save with translucency information, do check Alpha when you export the image.
Their word: Apple include information on removing image backgrounds in the Preview User Manual.
All transparently clear now?
Tips help fuel these email and tech how-tos.
How to Make an Image Background Transparent on a Mac Using Preview: FAQ
Can I use Remove Background repeatedly?
Yes.
If you apply the AI-powered Remove Background action on an image repeatedly, successively more of what Preview as identified as the foreground will be cut.
Can I undo removing the background?
Yes.
To undo removing the background from an image in Preview, press Command Z immediately after the action.
Does the transparent part have to be the background?
No, not with manual selection.
In Preview, you can make any part and color translucent. In any event, start with the center (or the most typical color value) to select.
What file formats will retain the alpha channel information?
In Preview you can use the following file formats for saving with transparency:
- HEIC
- JPEG-2000
- OpenEXR
- PNG
- TIFF
(Tested with macOS Tahoe 26.0–26.5, Sequoia 15.0–15.6, Sonoma 14.2–14.3, Ventura 13.3 and Monterey 12; first published June 2023, last updated June 2026)