
Tired of your Mac autocorrecting you in the wrong language? Looking to get suggestions in your mother or father’s tongue instead, or in a language you’re trying to pick up? Find out here how to change the autocorrect (and spelling) language on a Mac, and how to add missing languages if needed.
On This Page
First, Meno Sounds Exasperated
“And in what way will you inquire into something — ” Meno starts to sound exasperated, as is anyone’s wont in a Platonic dialogue opposing Socrates —
“In what way will you inquire into something when you don’t know what it is at all?”
“And if you do encounter it, how will you know that this is the thing that you did not know?”
In other words, if somebody asks you to bring a gowniphern (and refuses to tell you whether anything is a gowniphern), there’s no point in even beginning to look. For all you know, the gowniphern could be a glass of hot water or an abstract idea; it could be in a faraway galaxy or right in your hand.
The same, of course, is true for anything you do not know. Either you know and recognize it (or can remember to do so) — or you don’t. The only way to recognize what you are looking for is to already have known it.
That, of course, is Meno’s famous paradox, and we’re not going to solve it right now.
Instead, let’s have macOS go look for and remind us of correct spellings in all the languages we desire (including Ancient Greek):
How to Change the Autocorrect (and Spelling) Language on a Mac
Time needed: 2 minutes
To change which language your Mac uses to check spelling, suggest changes, and autocorrect what you type:
- Open System Settings on the Mac.
Here’s how: Select (the Apple logo symbol) in the macOS menu bar, for example, and choose System Settings… (or System Preferences…) from the menu that has appeared.
- Open the Keyboard section.
- Click Edit… under Input Sources.
Monterey: In macOS Monterey and earlier, go to the Text tab.
- Choose the language you want to use for autocorrecting and spelling checks under Spelling:.
Automatic language picker: You can have macOS deduct (usually correctly) the language from the words you have written; instead of choosing a language for Spelling:, select Automatic by Language.
Languages for automatic spelling: -You can still choose the languages your Mac will consider for automatic spelling; see below.
Missing language: If the language you use is not in the list, see below for adding spelling dictionaries to your Mac.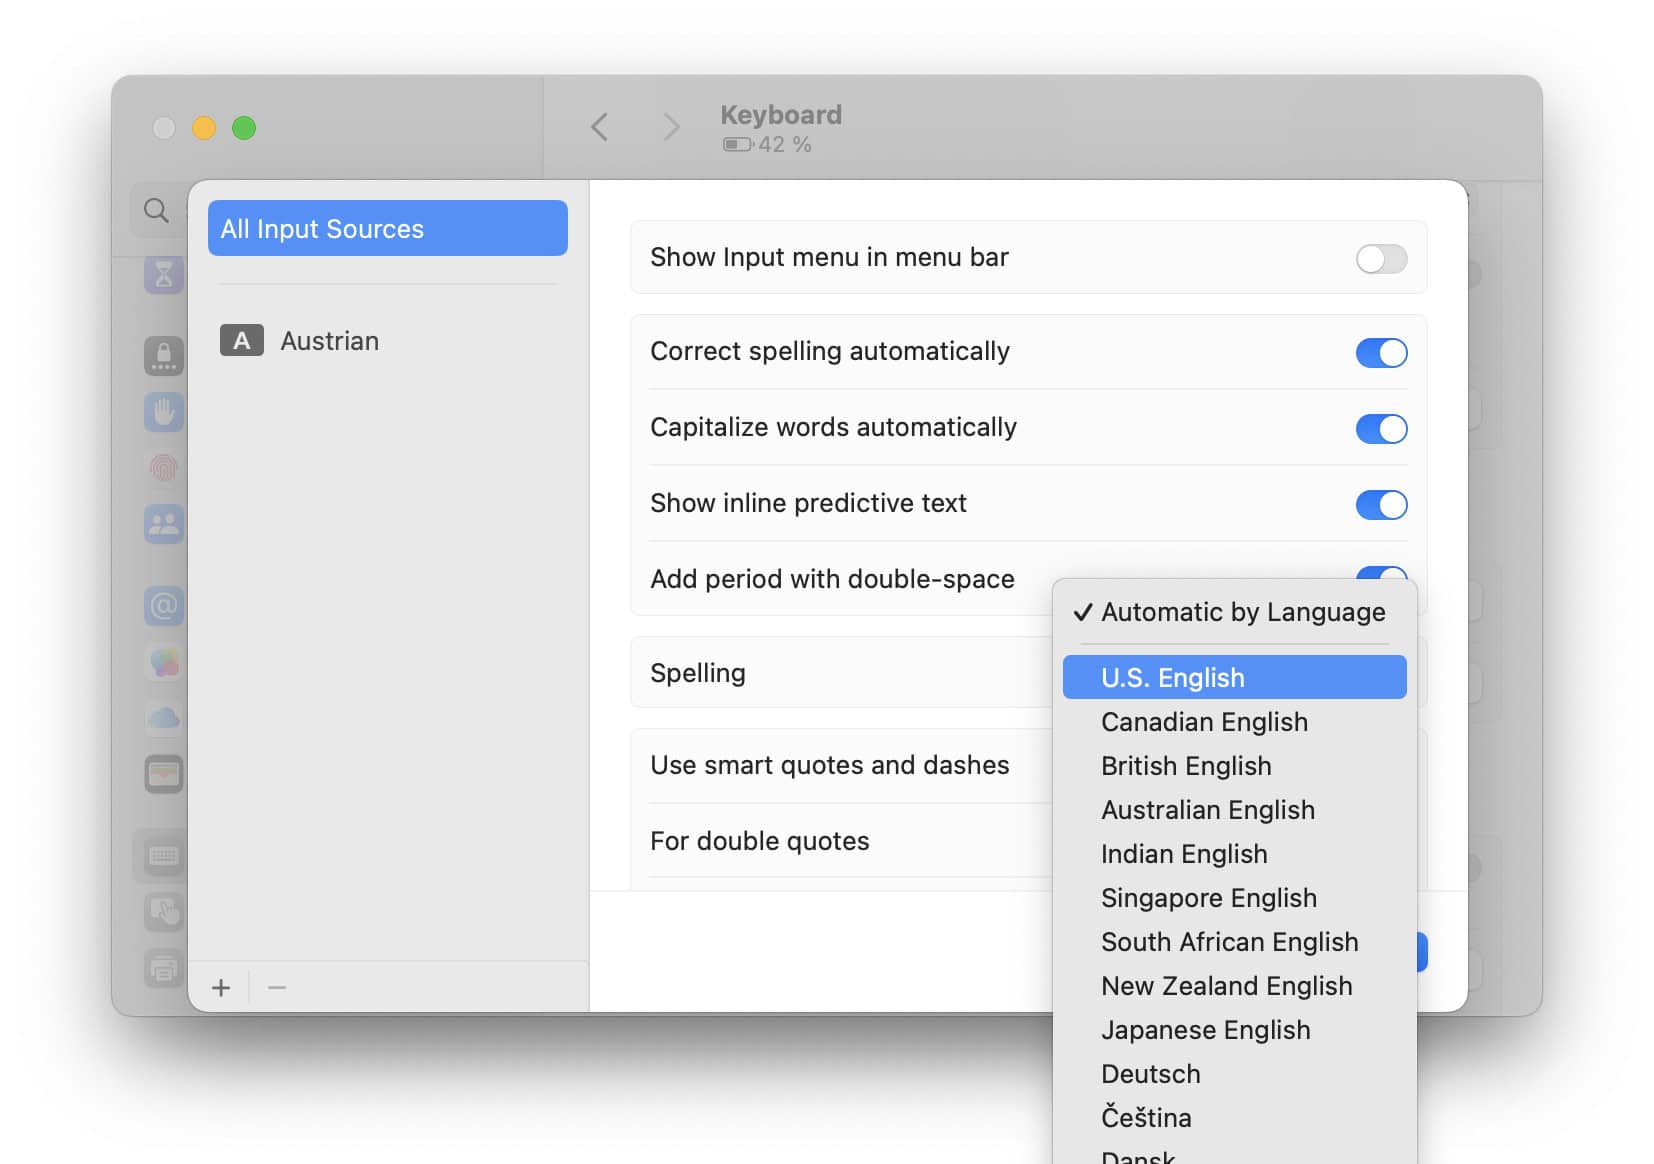
Choose Languages for Automatic Spell Checking on a Mac
To choose which languages macOS will consider for automatic spelling checks by language:
- Open the Spelling: language menu (see above).
- Choose Set Up… at the bottom of the language list.
- Check all languages you typically use to write — or want autocorrected.
Language variants: For languages with more than one dictionary, do choose at least one variant; you can check multiple dictionaries, though — say U.S. and Singaporean English.
No search: You must ogle for the desired languages; there is no way to search the list.
Missing language: You can add missing dictionaries; see below.
- Click Done.
- Do select Automatic by Language under Spelling:.
Add a Missing Spelling Dictionary to Your Mac
To add a spelling dictionary to macOS:
- Download the desired language (or language variant) from a selection of Hunspell dictionaries.
Alternatives: There are countless alternatives — any combination of Hunspell (or ispell) .DIC and .AFF files will work. These are used by LibreOffice, Firefox, InDesign, Emacs, Google Chrome, etc. - Open the downloaded .SOX file with Archive Utility.
Here’s how: Click on the file with the right mouse button and select Open With | Archive Utility from the menu.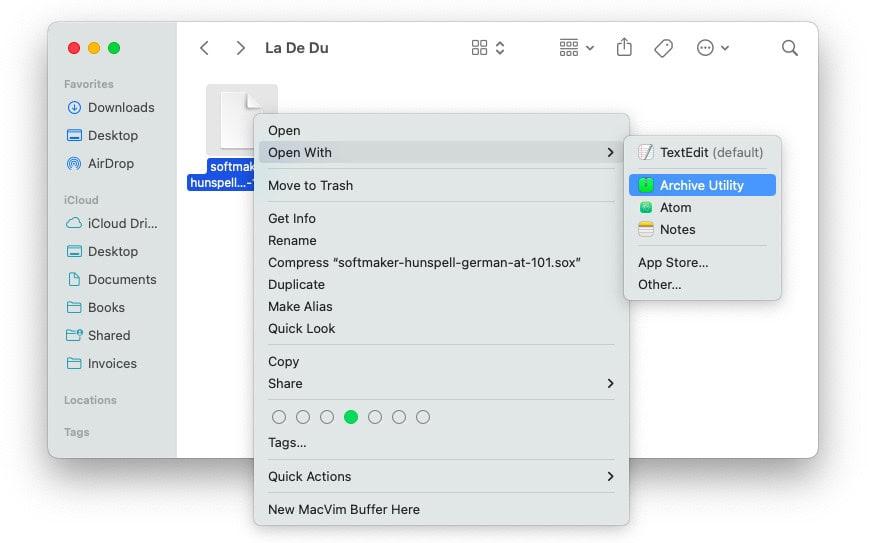
- Open the folder to which the files have been extracted (named like the original .SOX file, of course).
- Copy (or move) the language_COUNTRY.DIC file and the language_COUNTRY.AFF file to the ~/Library/Spelling folder.
Language_COUNTRY: Hunspell dictionaries use this naming convention: the two-letter ISO 639-1 language code in lowercase followed by an underscore followed by the two-letter ISO 3166 country code.
Example: To install dictionaries that include Austrian German (using the Frami dictionary in this case), copy the de_AT_frami.aff and the de_AT_frami.aff.dic file.
Here’s how: Open a new Finder window or tab, then go to the Folder ~/Library/Spelling using Command Shift G in that tab or window, and finally drag and drop the two files straight to the folder.
No subdirectory: You need not create any folder for the new language in the ~/Library/Spelling directory.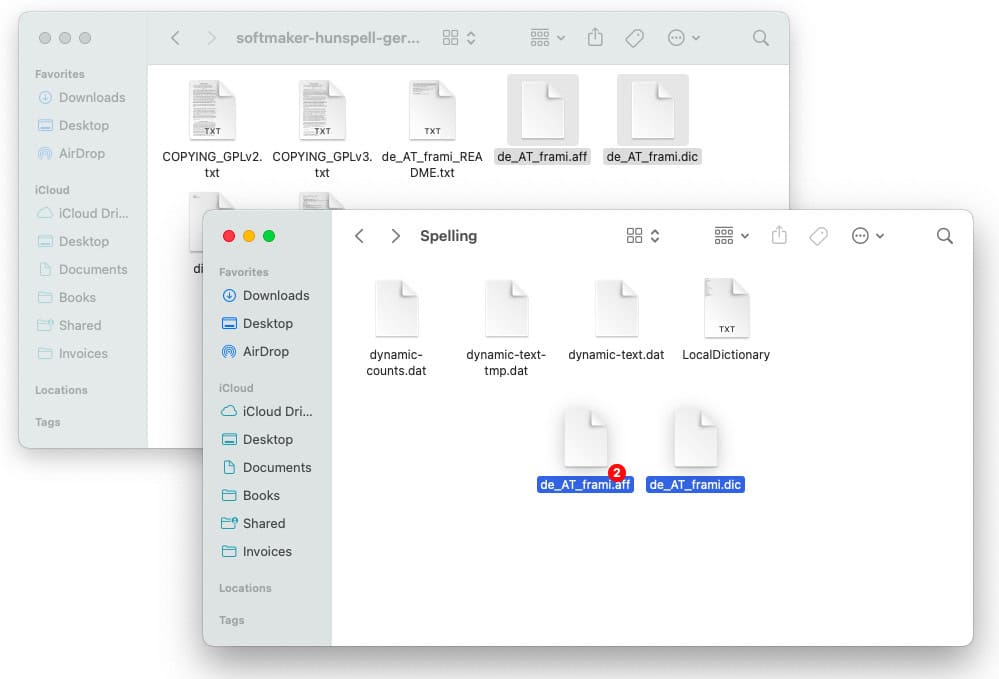
- Open System Preferences anew and choose the added language as the spelling language or add it to automatic checks.
What custom languages look like: Languages you have added appear with (Library) appended to their name.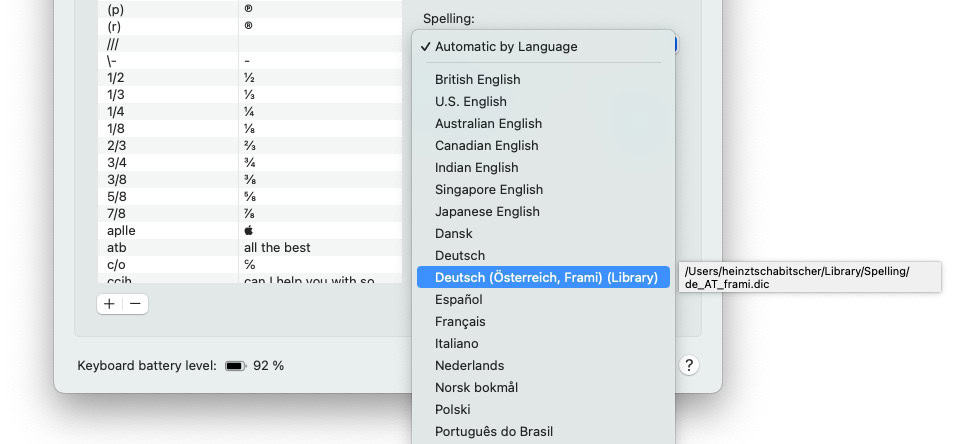
How to Change the Autocorrect (and Spelling) Language on a Mac: FAQ
Will changing the autocorrect language also change the keyboard layout?
No.
You can combine any language with any keyboard layout (or input source), and you can
- change the keyboard language of your Mac as well as
- change the language of the macOS interface, of course.
(Tested with macOS Tahoe 26.0, Sequoia 15.1–15.4, Sonoma 14.3, Ventura 13.1 and Monterey 12.3; first published April 2022, last updated October 2025)