
Wondering how to neatly mark up screenshots, highlight text with a marker line or draw attention with a red outline just using your Mac? Find out here how to draw perfect boxes and highlight with straight lines on a Mac screenshot ⤓ using macOS.
On This Page
How to Draw Perfect Boxes and Highlight with Straight Lines on a Mac Screenshot
Draw a Straight Line
Time needed: 1 minute
To draw straight lines on a Mac screenshot using macOS:
- Click the screenshot’s preview after you have made it.
Taking screenshots: You can take screenshots using the mouse and keyboard shortcuts on a Mac.
- Click the annotation button in the preview.
- Choose a color for the line.
Here’s how: Click the border color button in the toolbar, then pick a color.
Translucency: You can make the line transparent for highlighting; see below.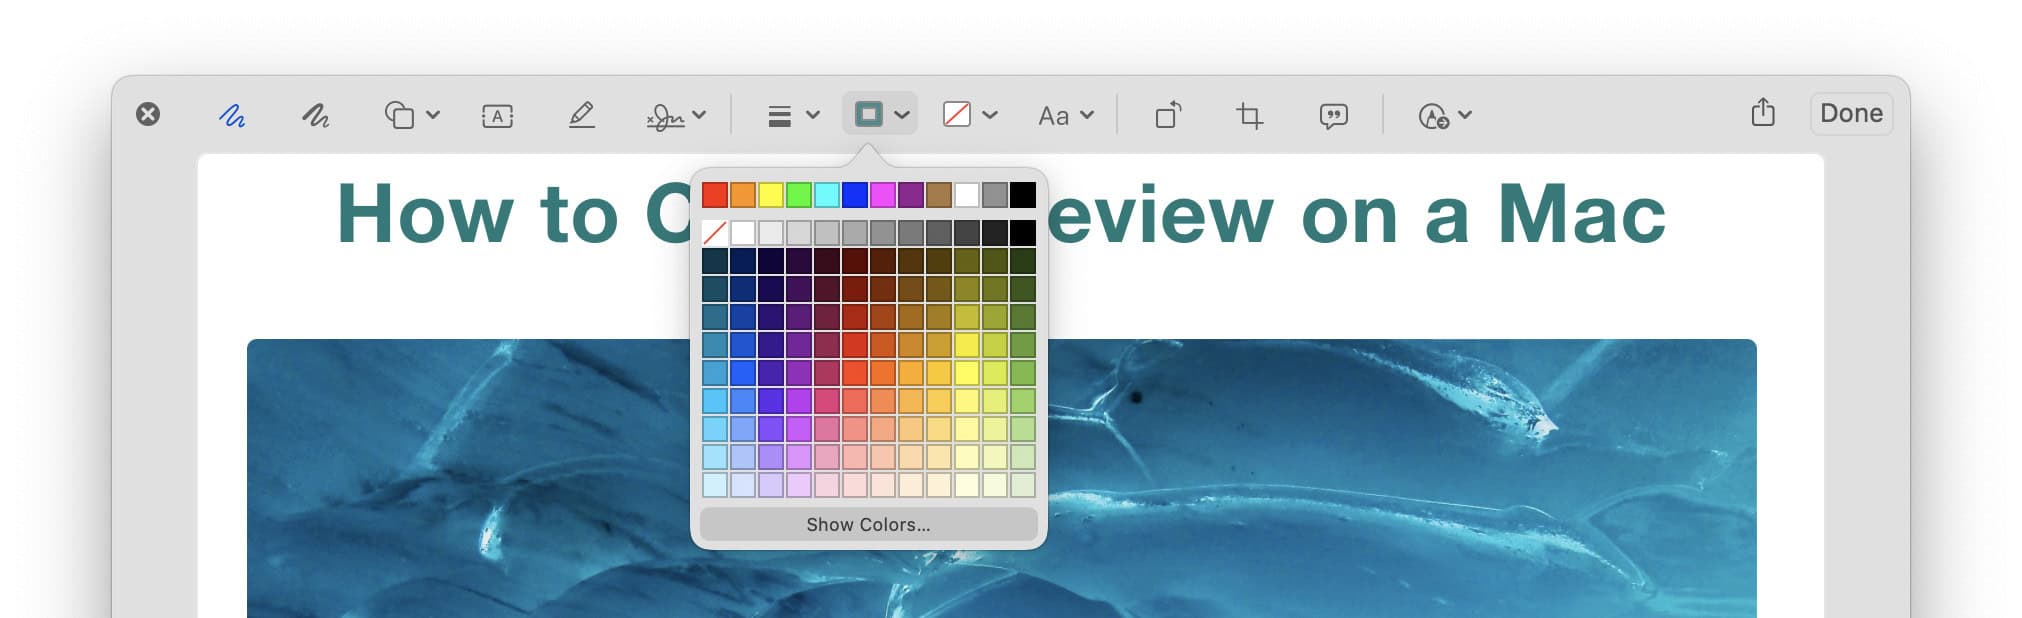
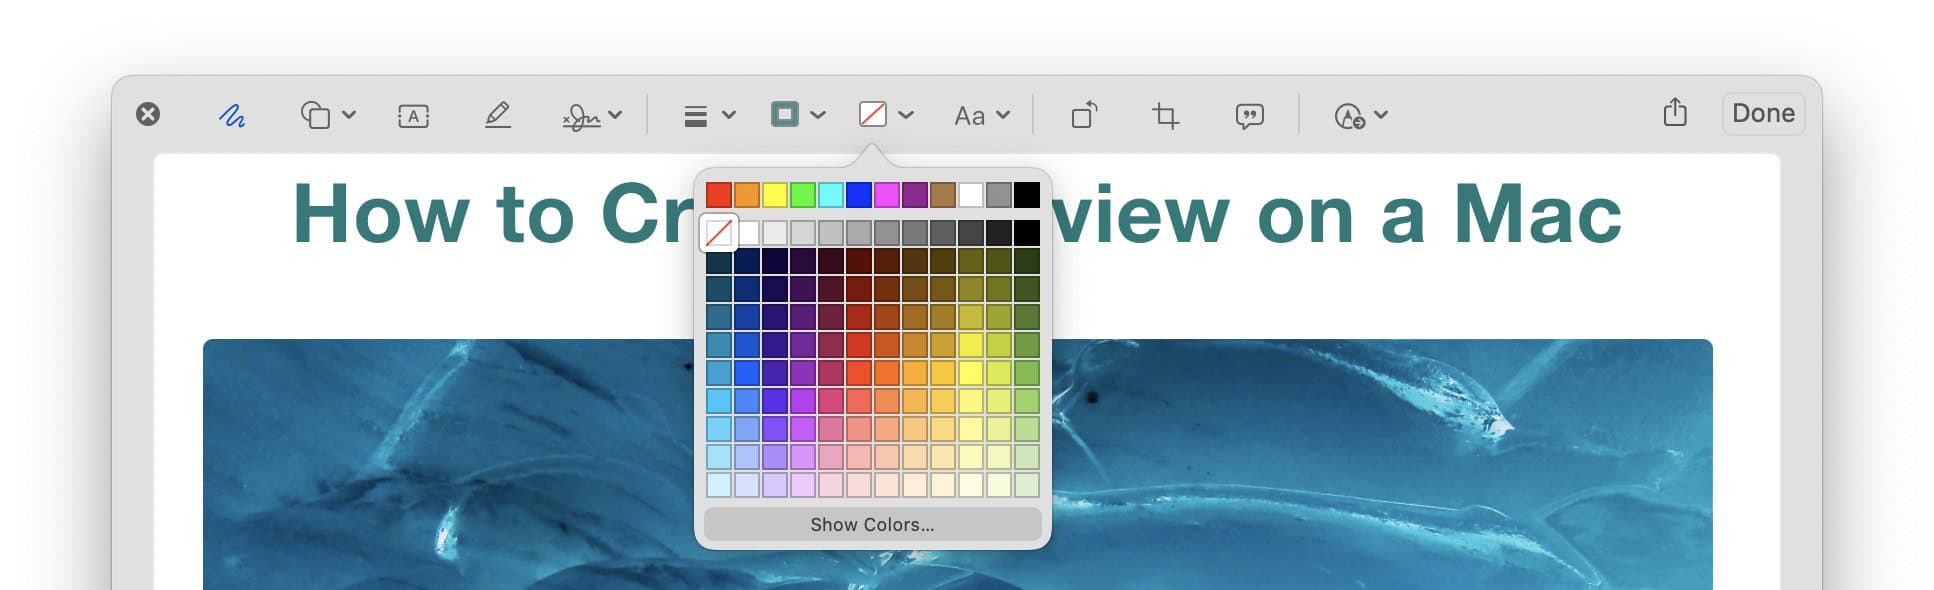
- Set no fill color.
Here’s how: Click the fill color button, then select the empty fill color.
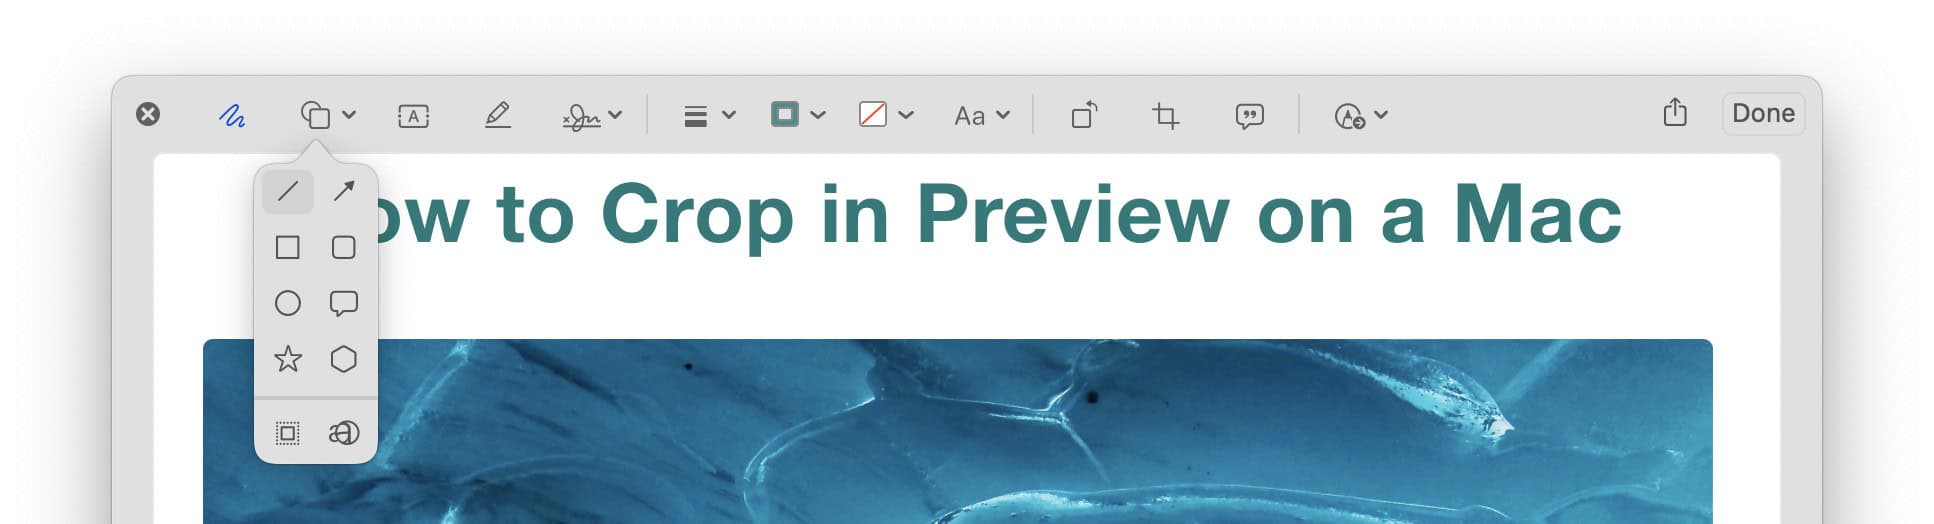
- Now click the Shapes button and select the line shape.
- Choose a line width and style.
Here’s how: Click the Shape Style button in the toolbar and pick the width as well as the style and add a shadow.
- Press and hold the Shift key.
- Use the blue handles to change the size of the line.
Grow or shrink fast: Press Option in addition to Shift to grow or shrink the line equally to both sides.
Angles: With Shift pressed, the line’s angle will snap to 0°, 45°, 90° and 135°. - Use the hand cursor as it appears over the line to move it.
The green handle: The green handle will not move the line as a whole but only the anchor to create curves.
- Let go of the Shift key.
Highlighting text: If the line is not thick enough for highlighting text, you can use a filled box; see below.
Their word: Apple include information on marking up screenshots and images in the Photos User Guide.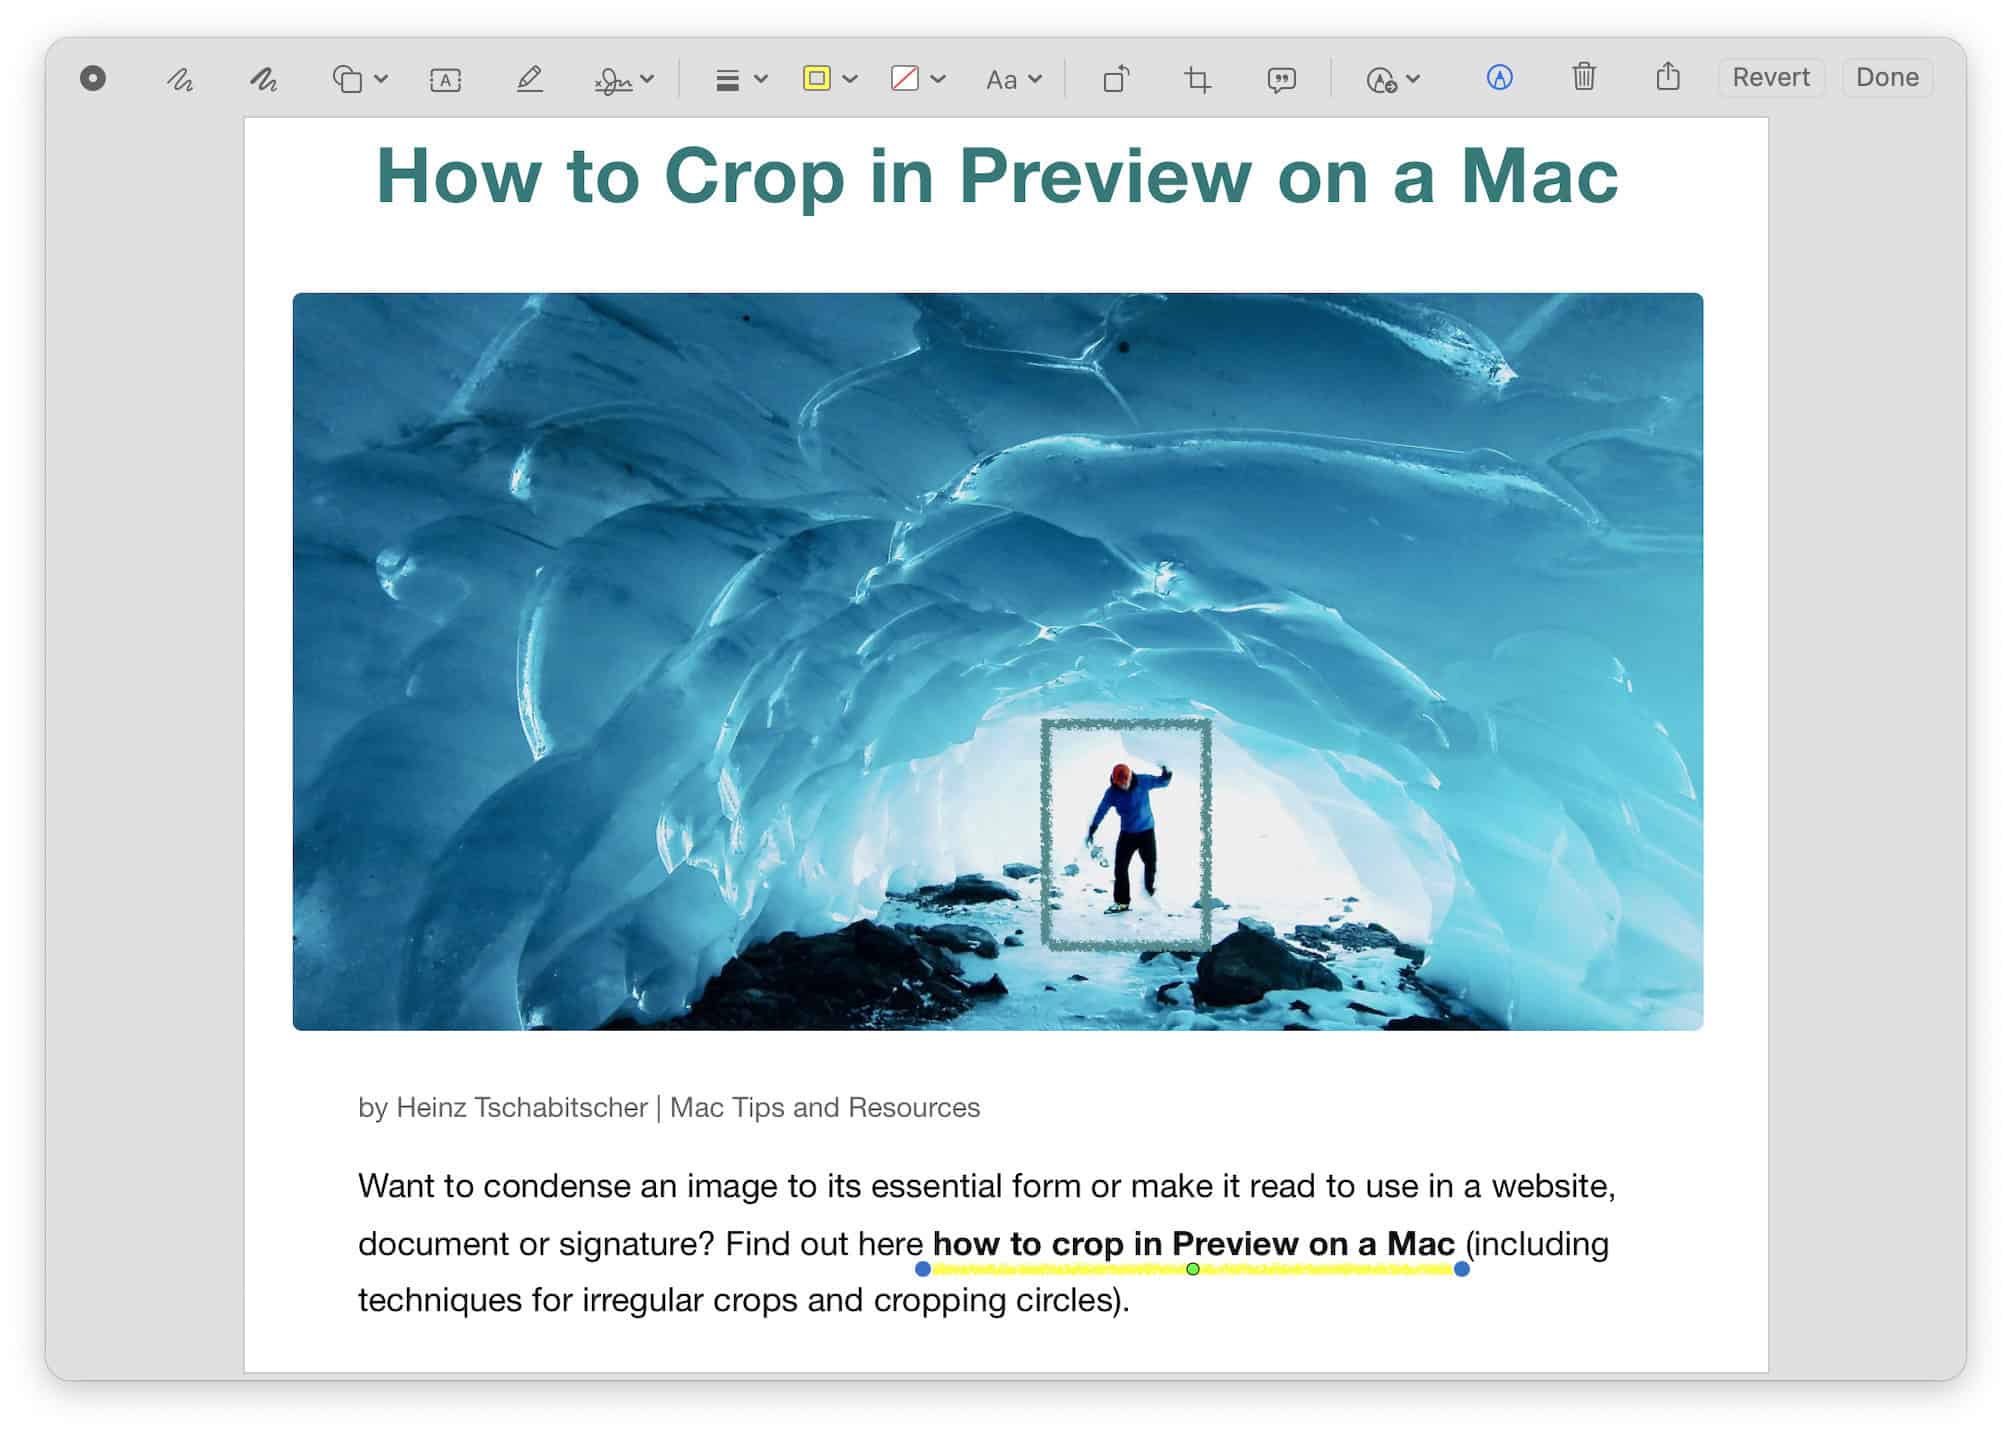
Got it straight?
Tips help fuel these email and tech how-tos.
Draw a Box or Thick Highlighting Line in a Screenshot
To draw a box or highlight with an arbitrarily tick line in a screenshot on a Mac:
- Click the annotations button in a Mac screenshot preview.
- Set the border and fill colors.
Highlight: Typically pick a translucent fill color (see below) and the empty border color.
Box: For a box, you can choose an empty fill color, of course, and the desired border color. - Pick a border style from the Shape Style button menu.
- Now choose the rectangle from the Shapes button menu.
- Use the blue handles to make the desired rectangle.
How to Draw Perfect Boxes and Highlight with Straight Lines on a Mac Screenshot: FAQ
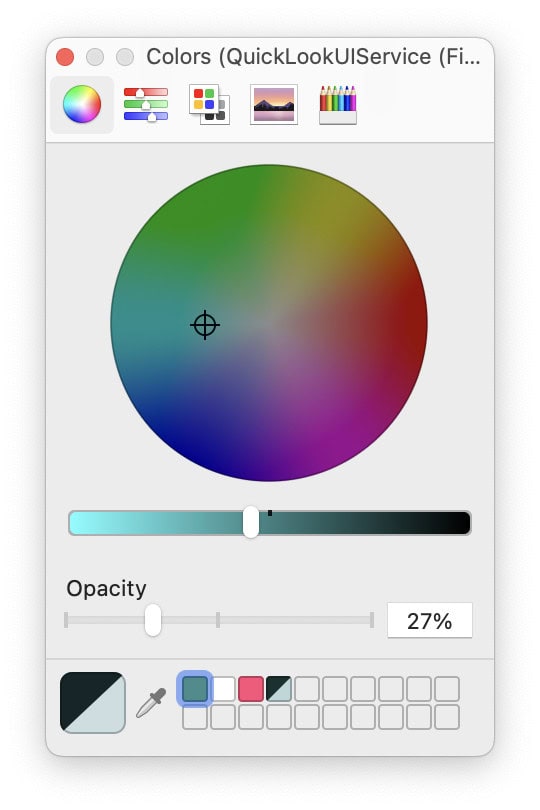
How can I draw a transparent highlighting line on a Mac screenshot?
To draw a translucent line or box:
- Click Show Colors… when you choose the color for filling a rectangle or drawing a line.
- Choose an opacity below 100% using the slider, or enter an opacity lower than 100%.
Can I draw lines or boxes on saved screenshots (and other images)?
Yes.
To annotate any image on a Mac:
- Highlight the image in a macOS Finder window.
- Press Space to open the image in Quick Look.
Using the mouse: You can also click on the image with the right mouse button and select Quick Look from the menu. - Now click the annotation button.
(Tested with macOS Tahoe 26.0–26.3, Sequoia 15.0–15.4 and Sonoma 14.1; first published November 2023, last updated March 2026)