
Noticed that Office on your Mac does not update properly? Microsoft AutoUpdate fails to update even itself? Find out here how to download and install the latest version of Microsoft AutoUpdate for Mac ⤓.
On This Page
First, Rusty Adhesive Tape
The magnetic tape you find in attics and museums used to record voice and music and images that move to boot is made of plastic, of course, and iron oxide — rust.
That’s why the tape is usually brown, and why you don’t have to visit the museum for one: you can easily make magnetic tape at home.
In addition to sound and video, the tape can hold data just as well, of course… the latest version, say, of Microsoft AutoUpdate you have downloaded:
How to Download and Install Microsoft AutoUpdate for Mac
Time needed: 5 minutes
To download the latest version of Microsoft AutoUpdate for Mac and install it to update Microsoft Office applications (such as Outlook for Mac):
- Visit Release history for Microsoft AutoUpdate (MAU) in your preferred browser.
- Download the latest Microsoft AutoUpdate package.
Which is the latest: The versions appear in reverse chronological order with the most recent on top.
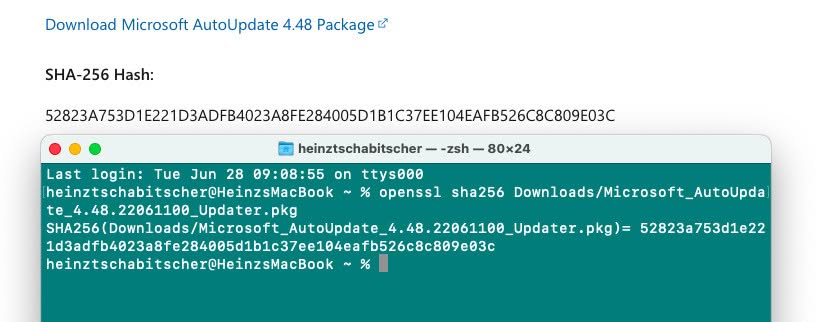
- Check the SHA-256 hash checksum against what you see on Microsoft’s download page.
Why is this important: Microsoft AutoUpdate will download and install Office software on your Mac; if it itself is tampered with, it can install malicious software masquerading as Office from third-party servers.

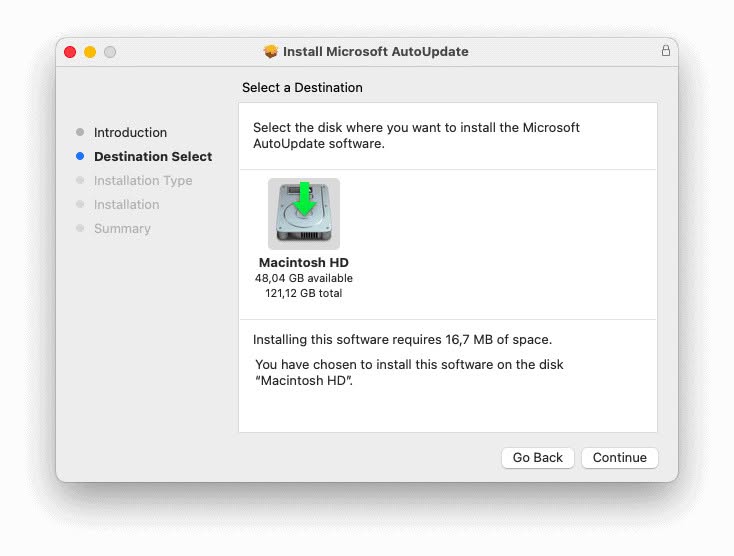
- Double-click the downloaded Microsoft AutoUpdate package file.
- Follow the steps to install Microsoft AutoUpdate.

New software smell hitting just right?
Tips help fuel these email and tech how-tos.
How to Uninstall Microsoft AutoUpdate
To uninstall Microsoft AutoUpdate from macOS:
- Open Finder on your Mac.
- Press Command Shift G to open Finder’s Go to Folder dialog.
- Type
/Library/Application Support/Microsoft/. - Click OK.
- Delete the MAU2.0 folder to remove Microsoft AutoUpdate.
- Press Command Shift G again.
- Now type
/Library/Preferences/. - Delete the com.microsoft.autoupdate2.plist file to remove AutoUpdate preferences.
(Tested with AutoUpdate 4.66–4.82 and macOS Tahoe 26.3, Sequoia 15.1–15.5, Sonoma 14.5, Ventura 13.3 and Big Sur 11.3; first published.May 2021, last updated March 2026)