
Want to cut up a photo in the shape of a circle, and all you get in Paint is a rectangle for cropping? Find out here how to crop any image into a circle shape in Paint for Windows and give them the shape they deserve.
On This Page
First, Fold a Sheet of Parchment Paper
in half one corner to its opposite. (If your sheet is not square, fold a short edge to a long one — and otherwise do not worry.)
Fold the triangle you got in half (halving the hypothenuse), and in half again, and again two more times perhaps, always keeping that point on the original hypothenuse as the ever more pronounced tip.
Now cut through all the layers with oh-so-gentle a curve, and you have just created what I remember being crafted over and over growing up in a hotel’s kitchen and bakery: a near-perfect circle to line a spring form’s bottom without, well, cutting in circles.
Now, let’s start baking some virtual circles:
How to Crop a Circle in Paint
Time needed: 15 minutes
To crop an image in the shape of a circle in Microsoft Paint:
- Click Color 1 (your foreground color) in MS Paint.
Here’s where: Color 1 is the upper of the two colors in the Paint toolbar.
- Select the color you will use as the background for your image.
Make it different: Choose a color that differs markedly from the edge of the cropped image. This lets you eventually remove the background altogether and make it transparent.
Black and white: If you do not need transparency, you can pick white, of course, or black for example. - Click Oval in the Shapes section.

- Click Shape outline (or Outline) in the Paint toolbar.
- Select Solid color.

- Now click Shape fill (or just Fill).
- Pick No fill.

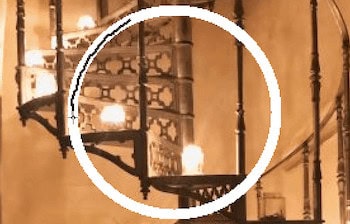
- Holding down the Shift key, click and drag to create a circle in the image.
Perfect circles: Shift makes sure you draw a circle (instead of an oval).
You can move it: You need not draw the circle in its final place; it is best if its size is as desired, however. - Click and drag to move the circle to match where you want to crop.

- Optional: Resize the circle using the handles.
Watch proportions: While you cannot fix the proportions, use the selection dimensions as a guide and make sure the height and width match.

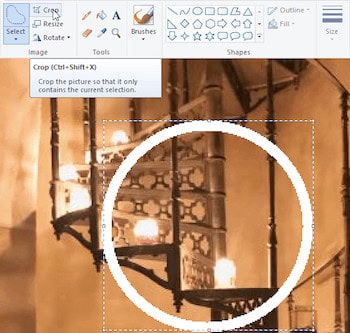
- Click Select in the toolbar.
- Pick Free-form (or Free-form selection).

- Click and draw inside the circle outline you just added to the image all the way around.
- Click Crop.
- If necessary: Click Rubber in the toolbar and remove any remaining splotches of paint outside your cropped circle.

Using Paint 3D? How to crop a circle in Paint 3D.
It doesn’t have to be a circle? How to crop in Paint.
How to Crop a Circle in Paint: FAQ
Can I save the cropped image with transparent background?
No, not in Paint.
Adding transparency is easy, however:
- Save the image as a PNG file in Paint.
- Upload the image to an online PNG transparency editor such as Online PNG Tools.
- Choose the background color you picked while cropping your circle as one to make transparent.
(Tested with Microsoft Paint 11.2302–2507; first published May 2020, last updated October 2025)